User Guide
Taskmaster is an AI-powered assistant that runs on your own device (Apple Mac or Raspberry Pi). You interact with it via its chat interface, WhatsApp, iMessage (Mac), or its control panel. It handles customer messages, manages your schedule, remembers your customers, browses the web, organises your files, and learns your business over time — all through natural conversation.
What You Need
- A Claude Pro subscription — sign up at claude.ai if you don't have one. Set this up first — Claude can then help you with every step that follows, including installing Taskmaster itself.
- Taskmaster running on one of:
- A Raspberry Pi (shipped to you pre-installed), or
- A Mac (installed from a package file)
Installation
Option A: Raspberry Pi (pre-installed)
If you received a Taskmaster device:
- Connect the power cable (USB-C) to the device
- Plug it into a wall socket or power strip
- Wait about 2 minutes for it to start up
WiFi: Your device needs an internet connection. You can plug a network cable directly into it, or connect a monitor and keyboard to set up WiFi (see “Using Your Pi as a Desktop” below). Need help? Message us on WhatsApp at +44 7591 215452 or visit taskmaster.bot.
Then open your web browser on any device connected to the same WiFi and go to:
http://taskmaster.local:18789
Option B: Install on a Raspberry Pi (or any Linux OS) yourself
You'll need a Raspberry Pi running Raspberry Pi OS with an internet connection (ethernet or WiFi), plus a monitor, keyboard, and mouse connected to the Pi.
- Open Terminal from the desktop taskbar (or press Ctrl+Alt+T)
- Run:
curl -fsSL https://taskmaster.bot/install.sh | sudo bash - Wait for it to finish (a few minutes — it installs Node.js if needed)
- Open a browser on any device on the same Wi-Fi network and go to:
http://taskmaster.local:18789/setup
You can also access the setup page from any other device on the same network at http://taskmaster.local:18789/setup.
After installation, Taskmaster runs in the background and starts automatically when the Pi restarts. It can take up to 2 minutes to come back online after a power cycle. You can disconnect the monitor and keyboard.
Option C: Install on a Mac
Open Terminal (search for “Terminal” in Spotlight) and run:
curl -fsSL https://taskmaster.bot/install.sh | sudo bashThis installs Node.js (if needed), Taskmaster, and sets up the background service. Once finished, open your browser and go to: http://taskmaster.local:18789/setup
Custom port: If you're running multiple Taskmaster instances (e.g., one on a Pi and one on a Mac), give each a different port:
curl -fsSL https://taskmaster.bot/install.sh | sudo bash -s -- --port 19000When using a custom port, the hostname includes the port to avoid conflicts. The setup URL becomes http://taskmaster-19000.local:19000/setup.
Option D: Install from a package file
If you received a .tgz package file (for offline install or when the install script isn't available):
- Install Node.js (version 22 or later) from nodejs.org if you don't have it
- Open a terminal and run:
npm install -g ~/Downloads/rubytech-taskmaster-2026.2.14.tgz taskmaster provision - Open your browser and go to:
http://taskmaster.local:18789/setup
Taskmaster runs in the background and starts automatically when your Mac restarts. It can take up to 2 minutes to come back online after a power cycle. You can close Terminal after installation.
Activating Your License
When you first open the setup page, you'll see a Device ID and a field for your license key.
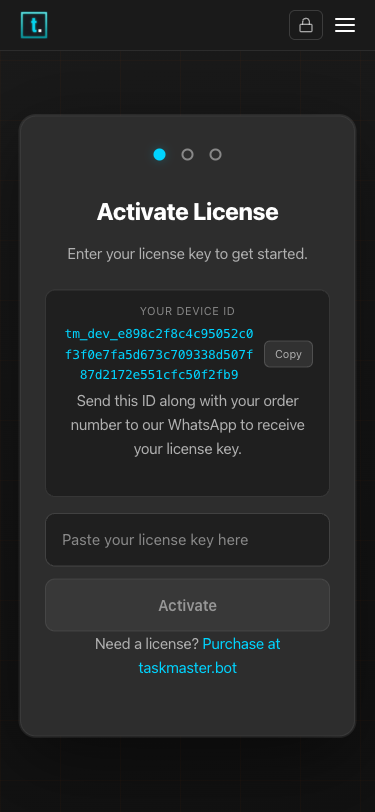
The license activation screen — paste your license key and tap Activate
- The setup page shows your Device ID — a code unique to your device
- Send this Device ID along with your order number to our WhatsApp support
- We'll send you back a license key tied to your device
- Paste the key into the setup page and tap Activate
- Wait for the green checkmark — the wizard will move on automatically
Your license is tied to this device. If you need to move it to a different device, contact support for a new key.
Setting Up
Once your license is activated:
1. Connect Your Claude Account
- Tap “Connect to Claude”
- Sign in with your Claude Pro account
- Copy the code shown and paste it into the setup page
- Tap Submit
- When connected, tap “Continue to Chat” to start configuring your assistant
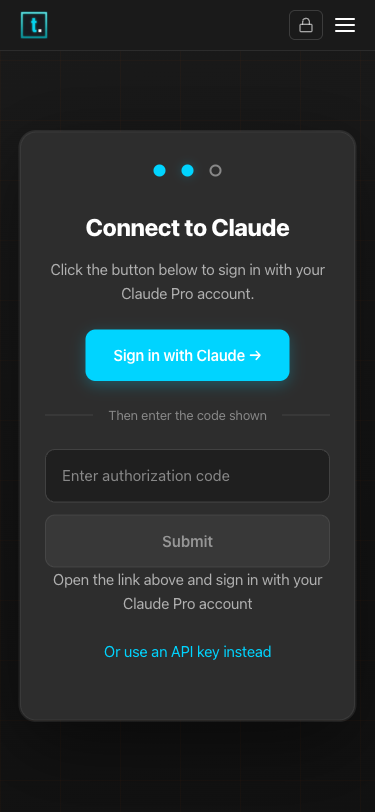
Connect to Claude — sign in and enter the code shown
Don't have Claude Pro? Click “Or enter your API key” below the Connect button. Paste your Anthropic API key and tap Submit. This is the advanced option — most people find signing in with Claude Pro much easier.
2. Link WhatsApp (optional)
WhatsApp is only needed if you want your assistant to handle customer messages or if you want to chat with it via WhatsApp. If you only plan to use the Chat page or iMessage (Mac), you can skip this step.
- The setup page shows a QR code
- On your phone: WhatsApp → Settings → Linked Devices → Link a Device
- Scan the QR code on screen
- Wait for all status lights to turn green
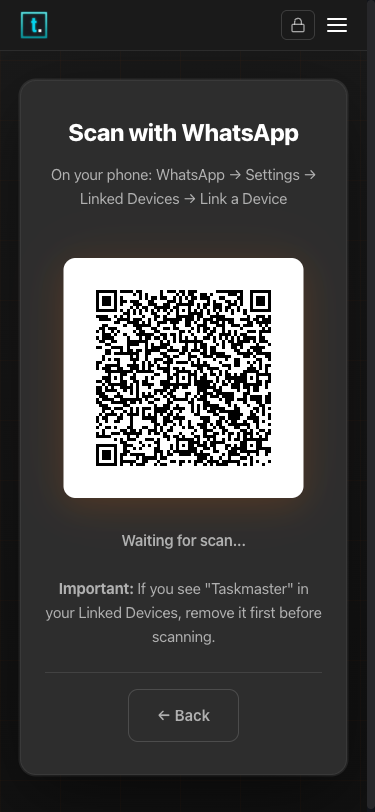
Scan the QR code with your phone to link WhatsApp
Important: If you see “macOS” or “Taskmaster” already in your Linked Devices for Taskmaster's connection, remove it first before scanning. (Taskmaster appears as “macOS” in the Linked Devices list.)
Private use only? If you want to use WhatsApp to chat with your assistant yourself but don't want customers to receive automated replies, make sure the Public facing toggle on the Setup page is turned off. This keeps WhatsApp connected for your own admin chat while the public assistant stays silent.
When all status lights turn green, your setup is complete:
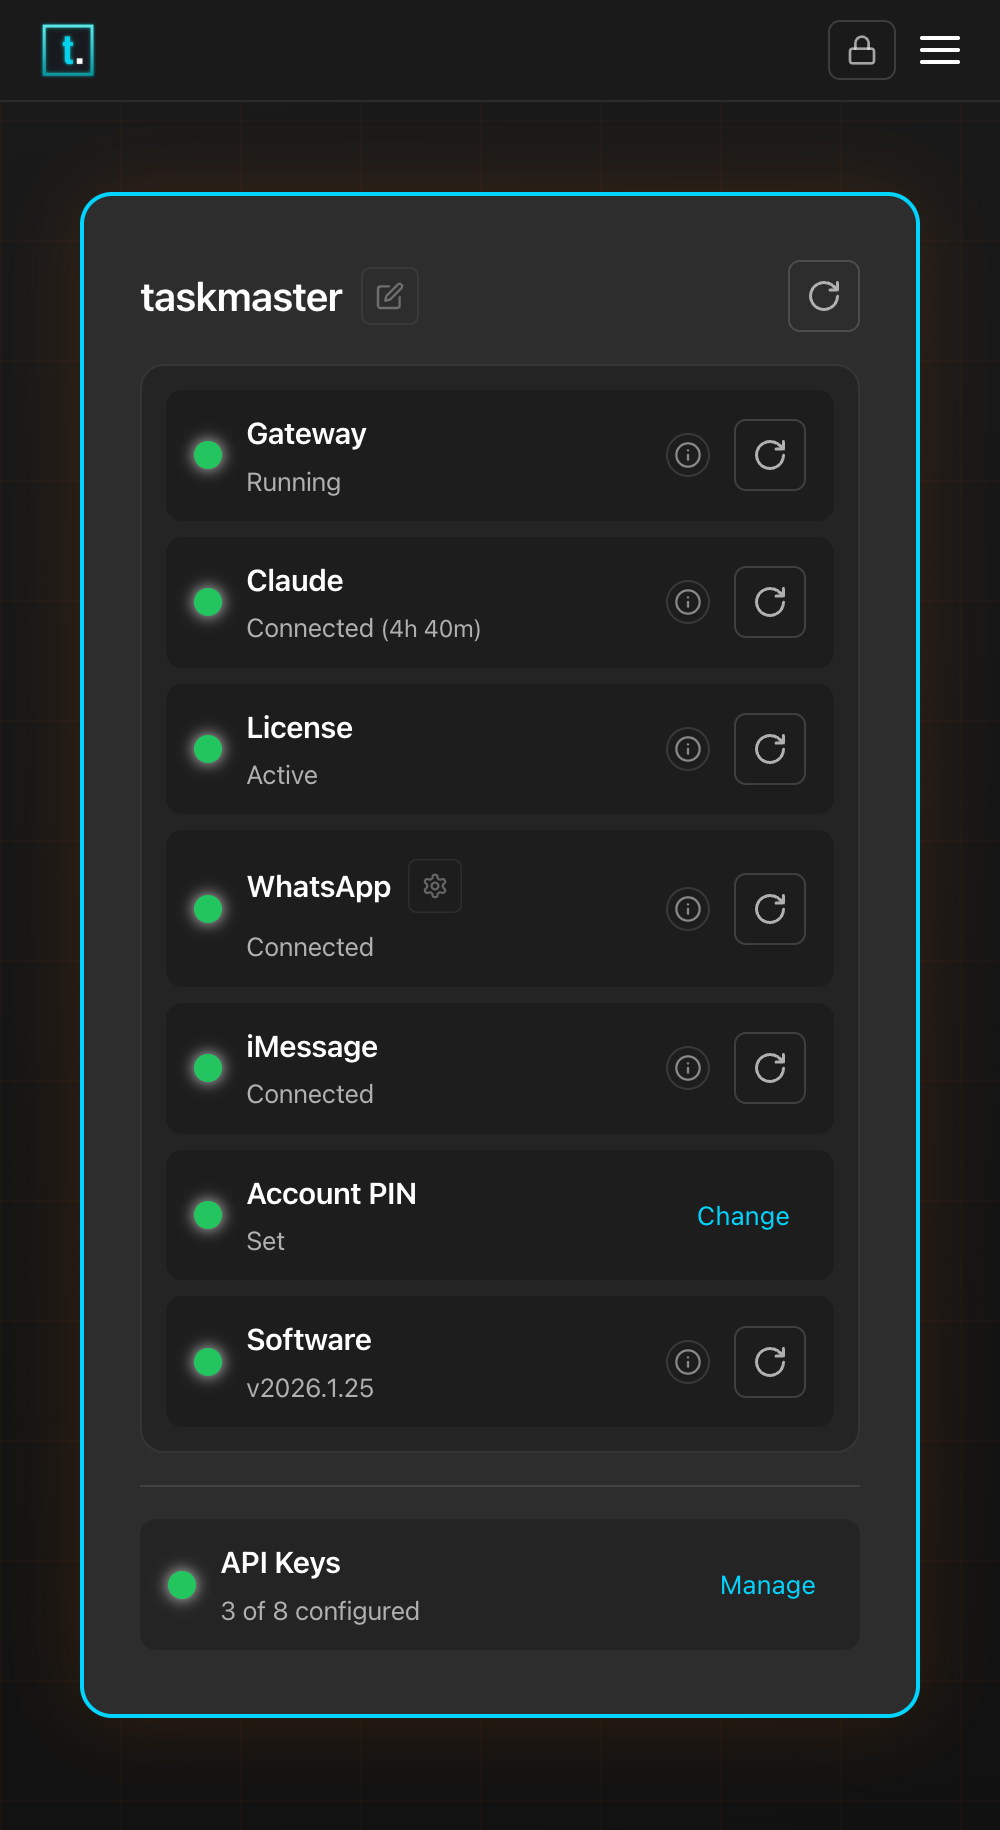
The Status Dashboard — all services showing green means you're ready
Control Panel
After setup, you'll see a navigation bar at the top of the screen linking to all your pages:
The Setup page with status dashboard — all services showing green
| Page | What it's for |
|---|---|
| Setup | Check connection status, reconnect services, link WhatsApp, manage API keys, toggle public messages |
| Chat | Talk to your admin assistant directly — the preferred way to manage your business |
| Admins | Choose which phone numbers get admin access |
| Contacts | Manage verified contact records (payment status, account details) that your assistant can look up but not change |
| Files | Browse and manage your assistant's knowledge files and memory |
| Browser | See what the assistant sees when it browses the web for you |
| Advanced | View events (automated tasks), sessions, skills, and logs |
Data Safety Alert
A shield icon appears in the navigation bar whenever your assistant writes a file to the public/ or shared/ folders. These are the folders visible to other assistants or customers, so you'll want to check that the right information ended up in the right place.
Tap the shield to see a list of recent writes — each entry shows the file name, which folder it went to, and when it happened. Once you've reviewed them, tap Mark All Reviewed to clear the list. The shield disappears until the next write.
This check runs automatically — the badge updates on its own without needing to refresh the page.
Quick Access to Your Control Panel
Scan this QR code from any device on your network to open the Taskmaster control panel:
Opens http://taskmaster.local:18789
Secure Connection (HTTPS)
Taskmaster automatically enables HTTPS when accessed from other devices on your network. This is required for features like voice recording in the browser, which need a secure connection.
The first time you access the control panel, your browser will show a security warning about the certificate. This is normal — Taskmaster generates its own certificate, which your browser doesn't recognise yet.
To proceed:
- Chrome / Edge: Click “Advanced” then “Proceed to…”
- Safari: Click “Show Details” then “visit this website”, confirm in the dialog
- Firefox: Click “Advanced” then “Accept the Risk and Continue”
You only need to do this once per browser. After that, the control panel loads normally. All bookmarks and http:// links still work — they automatically redirect to the secure version.
Security & PINs
Your dashboard is protected by two layers of security:
- Your network is the main barrier. The control panel only runs on your local network and your Tailscale network (if Remote Access is enabled). Nobody outside these networks can reach it. If you enable Internet Access, only the public chat is exposed — the control panel stays private.
- PINs prevent casual access within your network. The PIN stops other people on the same WiFi — family, employees, guests — from opening accounts that aren't theirs.
If you enter the wrong PIN 5 times in a row, you'll be locked out for 5 minutes before you can try again.
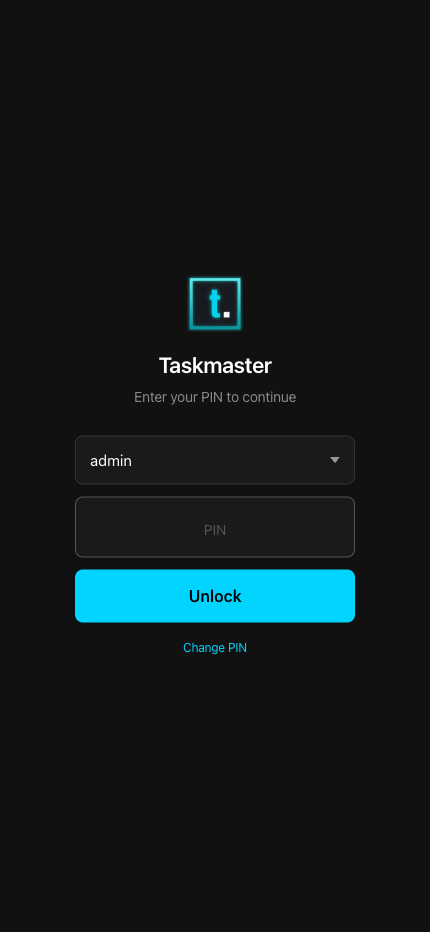
The login screen — enter your PIN to access the dashboard
First Time
The very first time you open the dashboard, you'll be asked to set a PIN (4-6 digits). This is your admin PIN — it gives you full access to everything. You'll need it every time you open the dashboard.
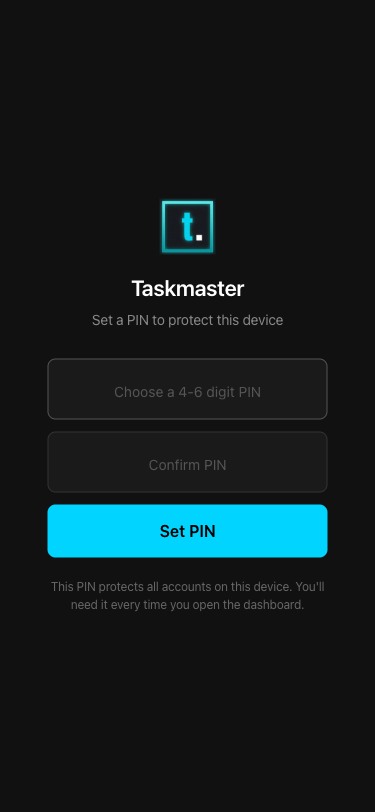
First visit — set a PIN to protect your device
Logging In
When you return, a login screen asks for your PIN. If you have multiple accounts, pick the account you want to operate on from the dropdown and enter the account PIN (this is different to the admin PIN). If you log into the admin account, you have access to all the other registered accounts.
Account PINs
If you share your device with other people (e.g. a business partner who manages a different account), each account can have its own PIN:
- Go to the Setup page
- Select the account from the dropdown at the top
- Look for the Account PIN row in the status panel
- Click Set PIN (or Change if one is already set)
- Enter a new 4-6 digit PIN and confirm it
When someone logs in with an account PIN, they only see their own account — they can't access other accounts or change device settings.
Changing Your Admin PIN
- On the login screen, make sure admin is selected in the dropdown
- Click Change PIN below the unlock button
- Enter your current PIN, then your new PIN twice
- Click Change PIN
Locking
Click the lock icon in the top navigation bar to log out. Your session lasts 24 hours — after that you'll need to enter your PIN again.
Forgotten PIN
If you forget your PIN, you'll need to edit the configuration file on the device. Contact support via WhatsApp for assistance.
Two Assistants, One WhatsApp
Taskmaster runs two assistants on the same WhatsApp number, each with a different job:
The Public Assistant handles messages from your customers. It can reply to messages and look up information you've taught it, but it cannot access your files, run commands, or see private notes. If a customer tries to trick it into doing something it shouldn't, it simply can't — those capabilities don't exist for it.
The Admin Assistant is your personal assistant. When you use the Chat page (or message yourself on WhatsApp), you're talking to this one. It has full access — it can manage files, browse the web, run scheduled tasks, and read everything.
How does Taskmaster know which is which?
There are two concepts to understand:
- Paired WhatsApp number — the WhatsApp account linked to your Pi during setup. This is the number your customers message. When you send yourself a message on this WhatsApp account (self-chat), it goes to the admin assistant.
- Admin phones — additional phone numbers that get admin access when they message the paired WhatsApp. Useful if you have a separate personal phone, or if a business partner needs admin access from their own number.
By default, messages from anyone other than registered admin phones go to the public assistant. You can add admin phones on the Admins page.
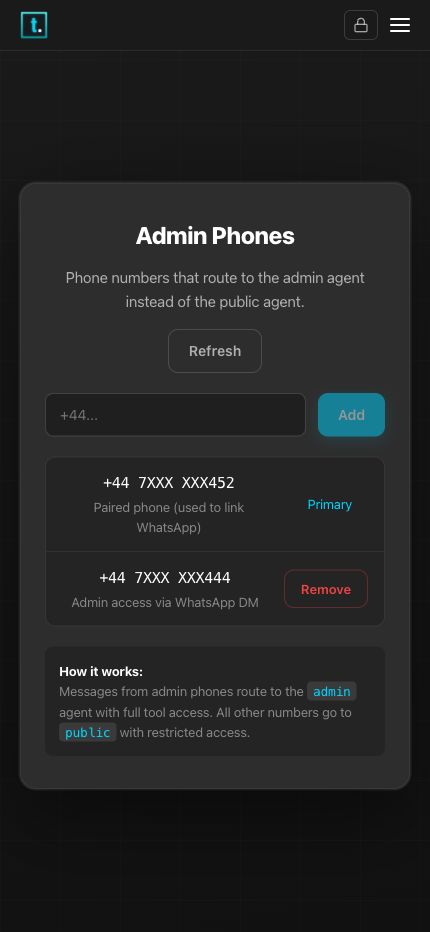
The Admins page — manage which phone numbers get admin access
Using Your Assistant
Once setup is complete, open the Chat page and say hello. Your assistant will introduce itself and ask a few questions about you and your business — this is how it learns who you are and what you do. A simple “hi” is all it takes to get started.
After that first conversation:
- Customers message your WhatsApp → The public assistant responds automatically
- You open the Chat page → You're talking to your admin assistant directly
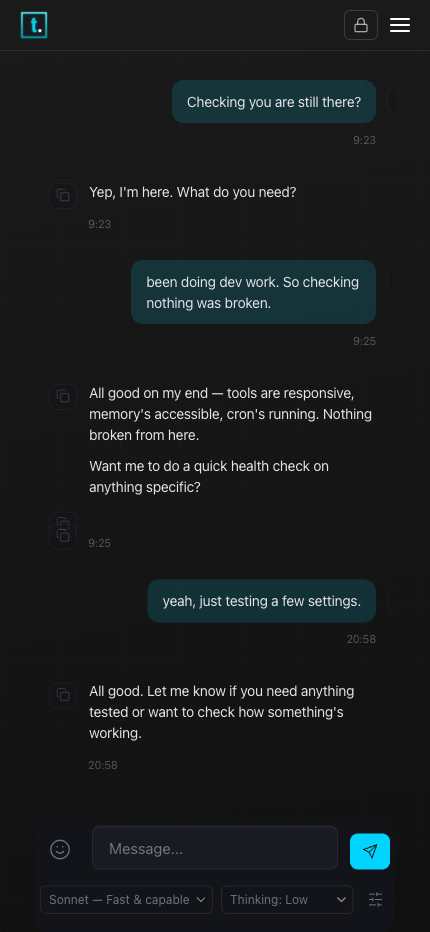
The Chat page — talk to your admin assistant directly
The Chat page is the preferred way to talk to your admin assistant. It's always available in the navigation bar, works from any device on your network, and doesn't depend on WhatsApp or iMessage being connected. You can also reach your admin assistant by messaging yourself on WhatsApp or iMessage — all three channels connect to the same assistant with the same knowledge and memory.
Your assistant learns your business from the files in its workspace. The fastest way to get started is to upload your existing documents — price lists, service descriptions, terms and conditions, FAQs — via the Files page or by dragging them into the Chat page. Your assistant will read and remember everything. You can also teach it through conversation — just chat naturally about your business, pricing, and how you work, and it will save what it learns.
Sending Files
You can send files to your assistant by dragging and dropping them onto the chat area. Supported types on the Chat page are images, PDFs, and text documents (.md, .txt, .csv, and similar). Files appear as chips below the message box — you can remove them before sending by clicking the X. You can also add a message along with the file to explain what you'd like done with it.
Via WhatsApp you can also send voice notes and videos — these are automatically transcribed or analysed before your assistant sees them.
Sending Messages While the Assistant is Working
If your assistant is busy thinking, you can still type and send more messages. They appear immediately in the chat as normal messages and are delivered to your assistant in order once it finishes its current task.
Suggestion Chips
After each response, a suggested follow-up appears as a clickable chip below the conversation. Tap it to send the suggestion, or type your own message — the chip disappears as soon as you start a new message. When you open a fresh chat session, a starter suggestion helps you begin the conversation.
Model and Thinking Level
Below the message box you'll see two dropdown selectors:
- Model — Choose which AI model your assistant uses. Opus is the most capable (best for complex tasks), Sonnet is fast and capable (good all-round), and Haiku is the fastest (great for quick questions).
- Thinking — Controls how deeply the assistant reasons before responding. “Off” is fastest. “Low” through “High” give increasingly thorough reasoning at the cost of speed.
Changes take effect immediately for the next message. You can also use the /model and /think chat commands for the same thing.
Note: These control your admin assistant (the one you chat with). To change the model or thinking level for your public assistant (the one that talks to customers), use the Model and Thinking dropdowns on the Setup page under WhatsApp.
What Your Admin Assistant Can Do
Your admin assistant has a wide range of capabilities beyond basic conversation. Here's what it can help you with.
Messaging & Communication
Your assistant can send messages, images, and reactions on your behalf — and relay messages you may have missed — all via the public agent.
| Capability | Description |
|---|---|
| Send messages | Send a WhatsApp message to any contact or group on your behalf |
| Send images | Share photos from your workspace files with a contact |
| Relay missed messages | Forward messages you missed while away, with a summary |
Memory & Knowledge
Your assistant can search, read, and update your business knowledge. It has full file access within your account workspace — it can create, read, update, and organise files.
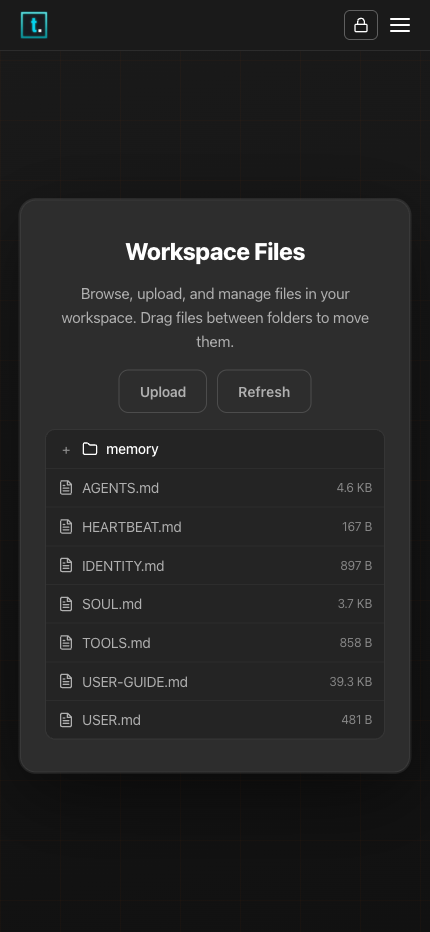
The Files page — browse, upload, and manage your workspace files
The Files page shows a status indicator next to the Re-index button — a green light means the index is up to date, red means files have changed since the last index. The count shows how many files and chunks are indexed. If the light is red or search results seem stale, click Re-index to rebuild.
| Capability | Description |
|---|---|
| Search knowledge | Find information across all your business files and notes |
| Read files | Open and read any file in your workspace |
| Write and update files | Create new notes, update existing files, or reorganise content |
| Save photos | Store images to customer folders or your workspace |
Web Search
Your assistant can search the web and read web pages to find information for you. This requires an API key for a search provider (see API Keys below).
| Capability | Description |
|---|---|
| Search the web | Look up current information, products, suppliers, regulations |
| Read web pages | Visit a specific URL and summarise or extract information from it |
Weather
Your assistant can check the weather for any location — current conditions, forecasts, humidity, wind, and more. No API key is needed.
| Capability | Description |
|---|---|
| Current conditions | Temperature, weather conditions, humidity, and wind speed for any city |
| Forecasts | Multi-day weather forecasts for planning ahead |
| Any location | Look up weather by city name, airport code, or coordinates |
Images & Documents
Your assistant can analyse photos you send it and read common document formats.
| Capability | Description |
|---|---|
| Analyse images | Describe what's in a photo — useful for job site photos, receipts, diagrams |
| Read PDFs | Extract and summarise content from PDF files |
| Read Office documents | Read Word (.docx), Excel (.xlsx), and PowerPoint (.pptx) files |
Image Generation
Your assistant can generate images from text descriptions using Google AI models. Ask for any kind of image — product photos, illustrations, logos, social media graphics — and it will guide you through style and model choices, then generate the image directly in the chat.
| Capability | Description |
|---|---|
| Generate images | Create images from text descriptions — photos, illustrations, graphics, logos |
| Multiple models | Choose from fast drafts (Gemini Flash) to high-fidelity output (Imagen 4 Ultra) |
| Style guidance | Your assistant helps with style, aspect ratio, lighting, and mood choices |
| Iterate | Refine results — adjust style, change composition, try a different model |
Image generation requires a Google AI API key (see API Keys below). Generated images are saved to your workspace and displayed inline in the chat.
Voice Notes & Video
When someone sends a voice note, image, or video, your assistant processes it automatically before responding — no extra steps needed.
| Media type | What happens |
|---|---|
| Voice notes | Automatically transcribed to text — your assistant reads the transcript and responds |
| Images | Automatically described — your assistant sees what's in the picture |
| Video | Key frames extracted and described — your assistant understands the content |
Recording voice notes in the Control Panel: When the text input is empty, a microphone button appears next to the send button. You can use it two ways:
- Tap the mic to start recording — a timer, trash button, and send button appear. Tap send when done, or trash to discard.
- Hold the mic to record — release to send, or slide your finger left to cancel.
Voice notes are transcribed and an audio player appears in the chat history so you can replay them.
Contact Records
Your assistant can look up and update verified contact records that you manage on the Contacts page.
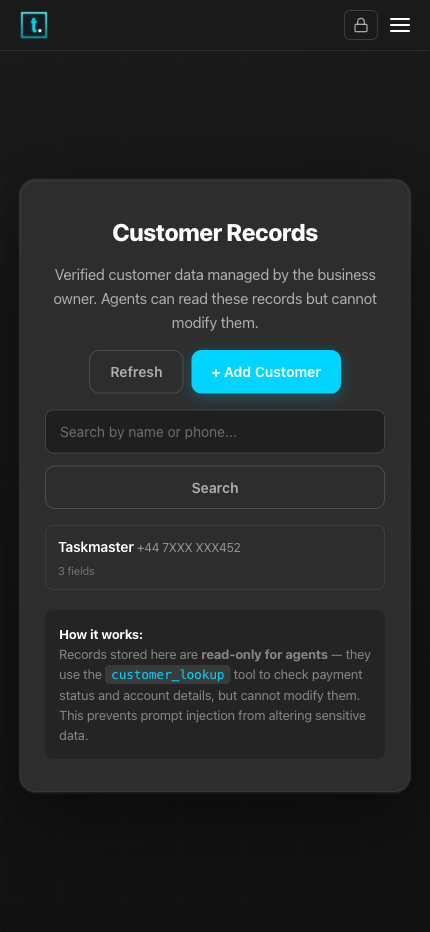
The Contacts page — manage verified contact data
| Capability | Description |
|---|---|
| Look up contacts | Find contact details by name, phone number, or notes |
| Update records | Add or change contact information (payment status, notes, etc.) |
Scheduling & Automation
Your assistant can manage recurring tasks, reminders, and automated routines. You can view and manage these on the Advanced page under the Events tab.
| Capability | Description |
|---|---|
| Set reminders | Schedule one-time or recurring reminders |
| Daily briefings | Get an automated morning summary of your day |
| Recurring tasks | Set up tasks that repeat on a schedule (daily, weekly, etc.) |
Proactive Outreach
Your assistant doesn't just respond to incoming messages — it reaches out on your behalf to win work, chase payments, and keep customers engaged.
| Capability | Description |
|---|---|
| Quote follow-up | Automatically nudges customers who haven't responded to a quote (default: 3 days) |
| Invoice reminders | Sends friendly payment reminders when invoices are overdue |
| Service reminders | Contacts past customers when it's time for a repeat service or annual check |
| Morning briefings | Sends you a daily schedule summary with jobs, pending quotes, and overdue invoices |
| Re-engagement | Follows up on old enquiries to see if a customer is still interested |
Your assistant learns your customers, their service history, and your pricing through normal conversations. It then uses scheduled events (visible under Events on the Advanced page) to trigger outreach at the right time. You don't need to configure anything manually — the assistant sets up follow-ups as part of its normal workflow.
Customise timing: Tell your assistant “follow up on quotes after 5 days instead of 3”, “send invoice reminders after 7 days”, or “send my briefing at 6:30am instead of 7am”. All outreach messages are sent as your assistant — customers reply normally and the conversation continues.
Conversations & Sessions
Your assistant has full access to conversation history across all channels — WhatsApp, webchat, iMessage, and group chats. It can find specific messages, review entire conversations, and give you an overview of all activity.
| Capability | Description |
|---|---|
| List conversations | See who has been messaging and when — across all channels |
| Review history | Read back through past conversations with a specific contact |
| Search messages | Find messages containing specific words or topics |
| Filter by channel | Show only WhatsApp, webchat, or iMessage messages |
| Filter by time | Narrow results to a specific date or time range |
| All activity | Get a summary of messages across all customers and groups at once |
| Send between sessions | Send a message to a customer outside of an active conversation |
Try asking:
- “Who messaged today?” — lists all conversations with recent activity
- “What did Sarah ask about yesterday?” — reviews a specific contact's history
- “Find any messages that mention boiler” — searches across conversations
- “Show me all WhatsApp messages from today” — filters by channel
- “What happened between 9am and 10am?” — filters by time range
- “Show me all customer messages from today” — aggregates across all conversations
Admin Management
| Capability | Description |
|---|---|
| Add admin phone | Grant admin access to a new phone number |
| Remove admin phone | Revoke admin access from a phone number |
| List admins | See all current admin phone numbers |
Web Browsing
Your assistant can open and interact with websites in a built-in browser — filling in forms, clicking buttons, and navigating pages. You can watch what it's doing on the Browser page in real time, and take over if it needs help (for example, to complete a CAPTCHA or log in to a site).
| Capability | Description |
|---|---|
| Browse websites | Open any website, read content, fill in forms, click buttons |
| Sign up for services | Create accounts on third-party sites (e.g. to get API keys) |
| Complete multi-step tasks | Navigate through checkout flows, registration pages, or dashboards |
Tip: Keep the Browser page open while your assistant browses — you can see exactly what it's doing and step in if a site asks for a CAPTCHA or login.
Business Idea Validation
Thinking about a new product, service, or direction for your business? Your assistant can walk you through the process of validating the idea before you invest time and money — from initial concept through customer discovery and assumption testing to a clear product brief.
| Phase | What happens |
|---|---|
| Discovery | Clarify your idea, define your target customer, plan customer conversations, and assess the market |
| Validation | Identify the riskiest assumptions in your idea and design quick tests to check them |
| Product brief | Turn the validated concept into a clear document — problem, audience, features, success metrics, and next steps |
Your assistant guides you through each phase conversationally — you don't need to know any frameworks or jargon. Just describe your idea and it will ask the right questions.
API Keys
Your assistant uses AI services behind the scenes. Claude Pro is the only requirement — everything else is optional and adds extra capabilities.
Connecting to Claude
During setup, you connect to Claude in one of two ways:
- Sign in with Claude (recommended): Click “Connect to Claude” and sign in with your Claude account — this is the easiest way
- API key (advanced): Click “Or enter your API key” and paste your Anthropic API key directly — only if you already have one
Optional API Keys
These unlock additional capabilities. All are optional — your assistant works without them. The Setup page shows the recommended keys prominently, with additional keys available under “Additional keys”.
| Provider | What it unlocks | Free tier? |
|---|---|---|
| Tavily | Web search — lets your assistant search the internet | Yes |
| Voice note transcription, video analysis, and image generation | Yes (limited) | |
| Hume | Expressive text-to-speech voice replies | Yes |
Note: Image analysis does not need an extra API key — Claude has built-in vision and analyses images directly. Voice replies work without any key using Microsoft Edge TTS — the Hume key is optional for higher-quality expressive voice.
Managing Keys
- Go to the Setup page
- Click on the API Keys row in the status dashboard
- Enter a key next to any provider and click Save
- To remove a key, click Remove next to it
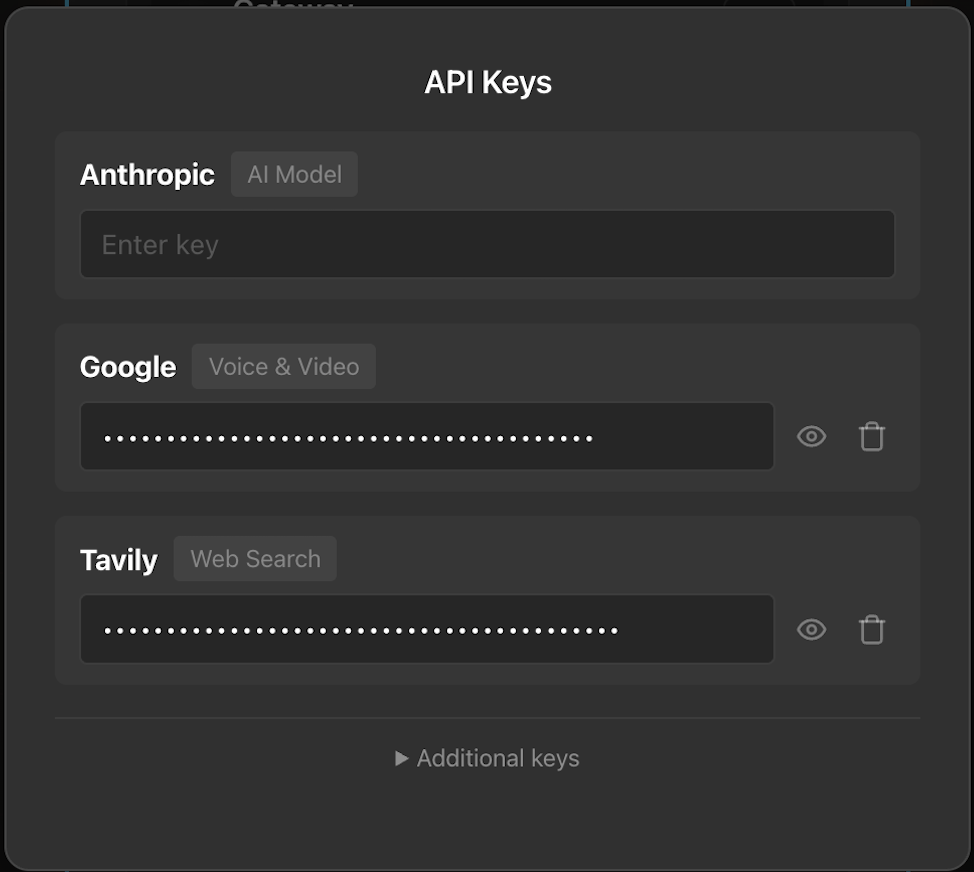
The API Keys modal on the Setup page — enter your keys here
Recommended Free Keys
To get the most out of your assistant at no extra cost, we recommend signing up for two free services: Tavily (web search) and Google AI (voice notes and video). Both are free and take a couple of minutes each.
Tip: Your assistant can do this for you. Just ask — for example, “Help me get a Tavily API key” — and it will use the browser to walk through the process. You can watch on the Browser page and step in if needed. The instructions below are for doing it yourself.
Getting a Tavily Key (Web Search)
- Go to app.tavily.com
- Click “Continue with Google” (easiest — no CAPTCHA) or sign up with your email
- If using Google, select your Google account and grant permission
- You'll land on the Tavily dashboard — your API key is shown in the API Keys table
- If the key is hidden, click the eye icon to reveal it
- Copy the key (it starts with
tvly-) - Go to your Taskmaster Setup page, click the API Keys row, find Tavily, paste the key, and click Save
You get 1,000 free search credits per month — more than enough for daily business use.
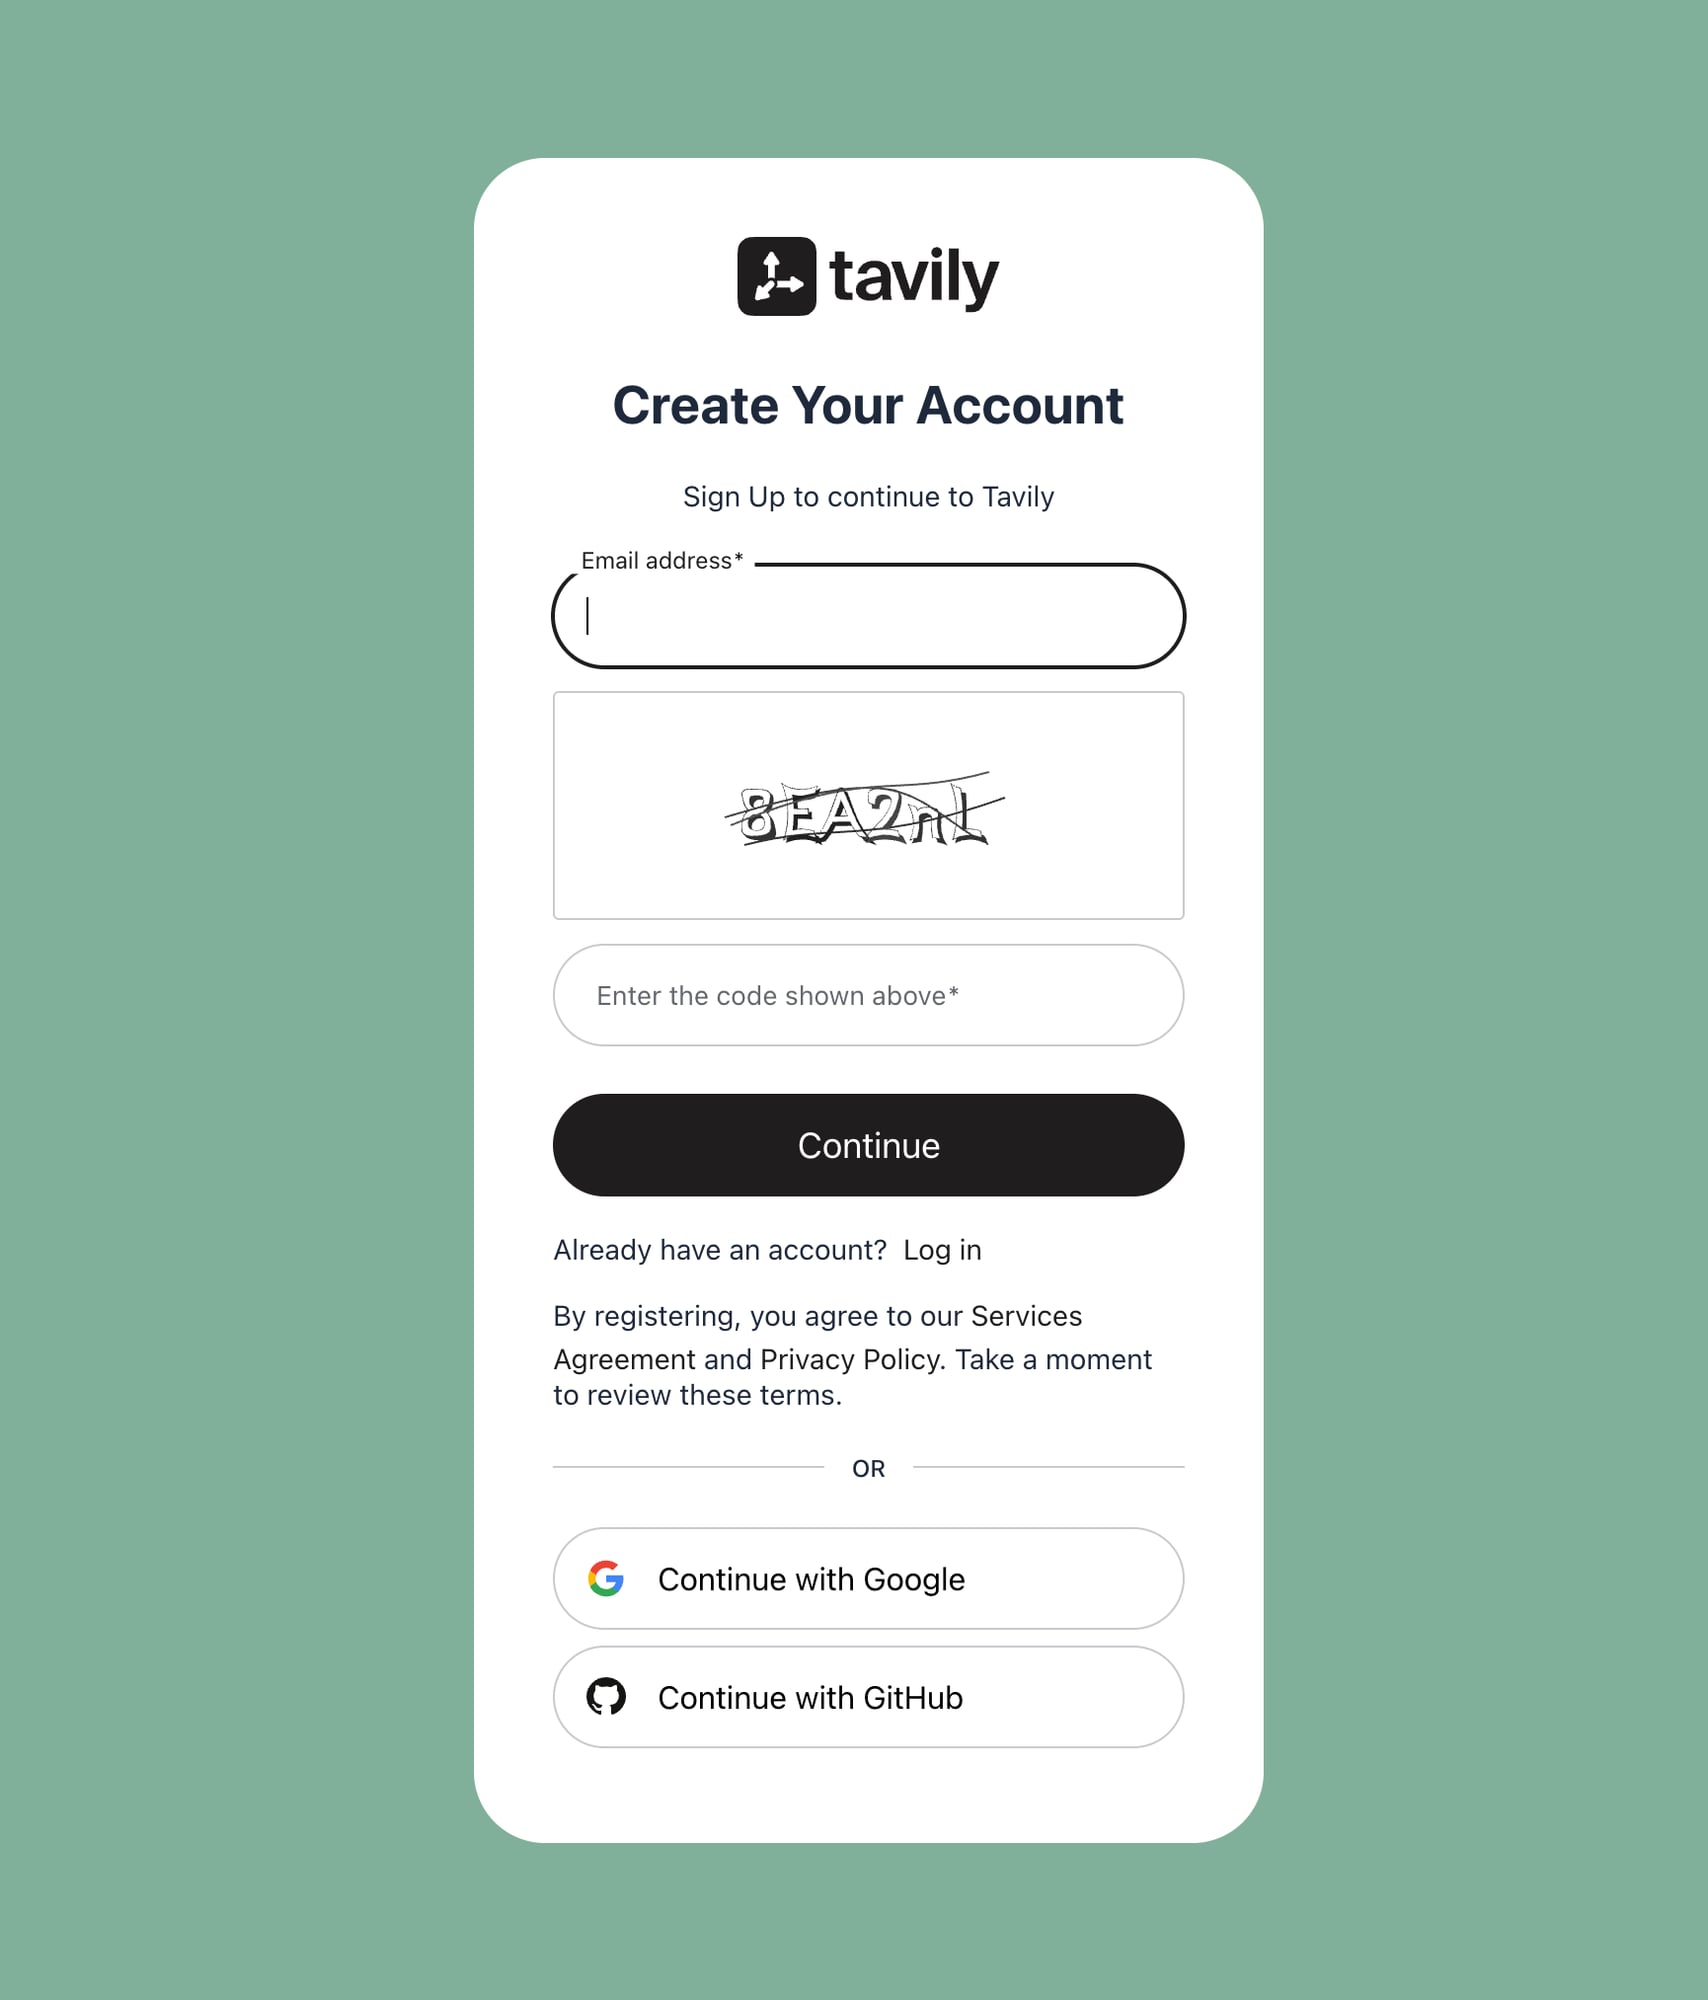
Tavily signup — click 'Continue with Google' for the easiest path
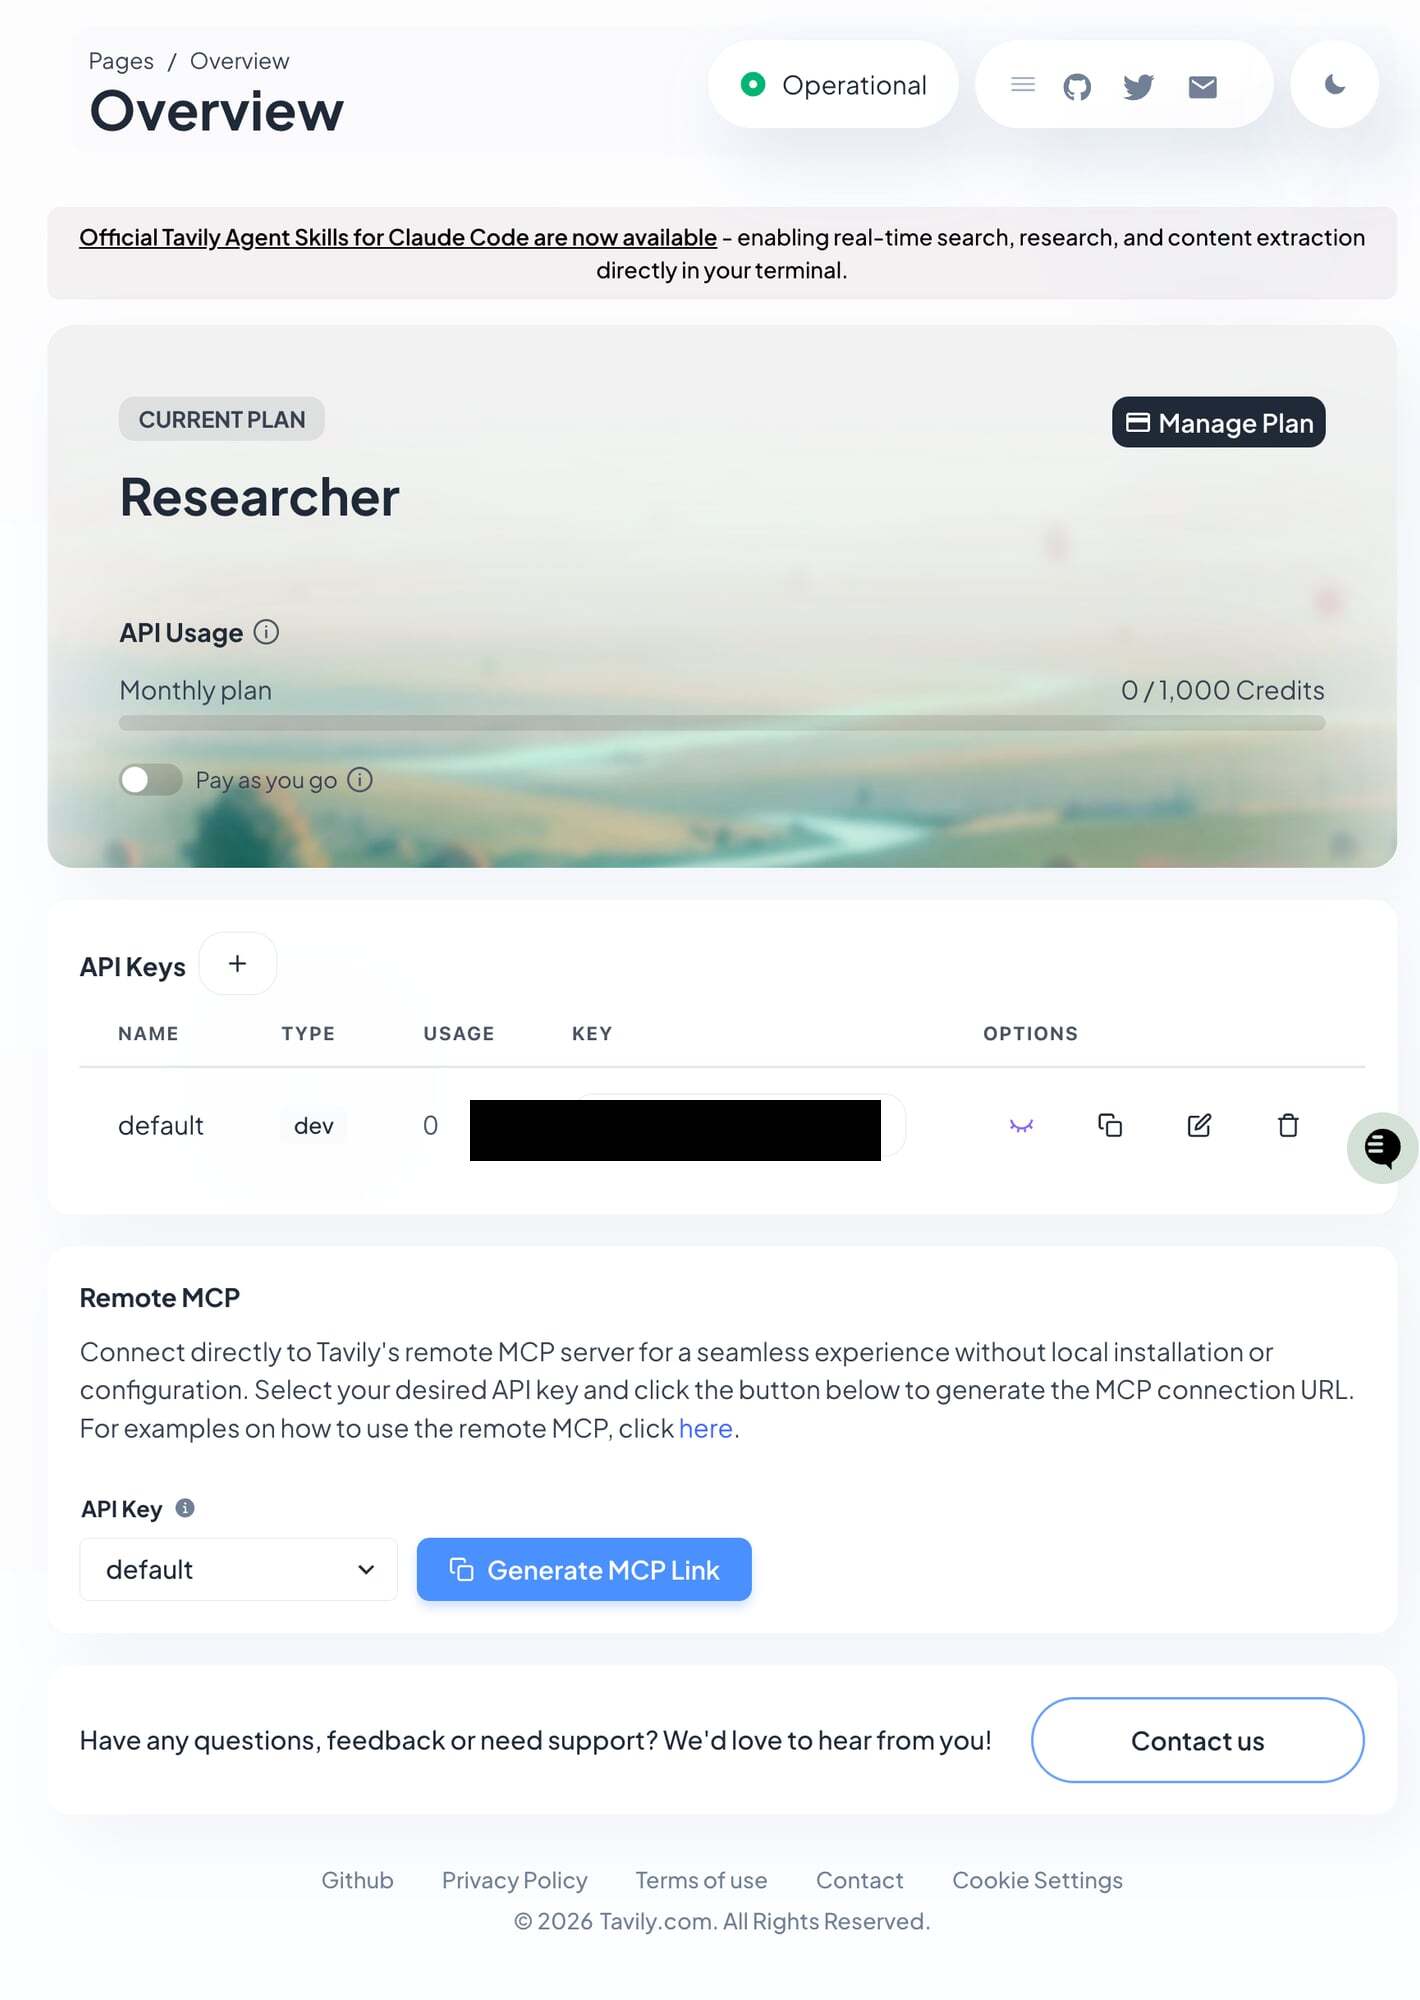
Your Tavily API key appears on the dashboard after signup
Getting a Google AI Key (Voice Notes & Video)
- Go to aistudio.google.com and sign in with your Google account
- Click API keys in the left sidebar (or go directly to aistudio.google.com/api-keys)
- If you already have a key listed, click the key name to view it. If not, click “Create API key”
- Copy the key (it starts with
AIza) - Go to your Taskmaster Setup page, click the API Keys row, find Google, paste the key, and click Save
The free tier works for low-volume use (a handful of voice notes or images per day). For higher volumes, you'll need to enable billing in your Google Cloud account — see Google AI pricing for details.
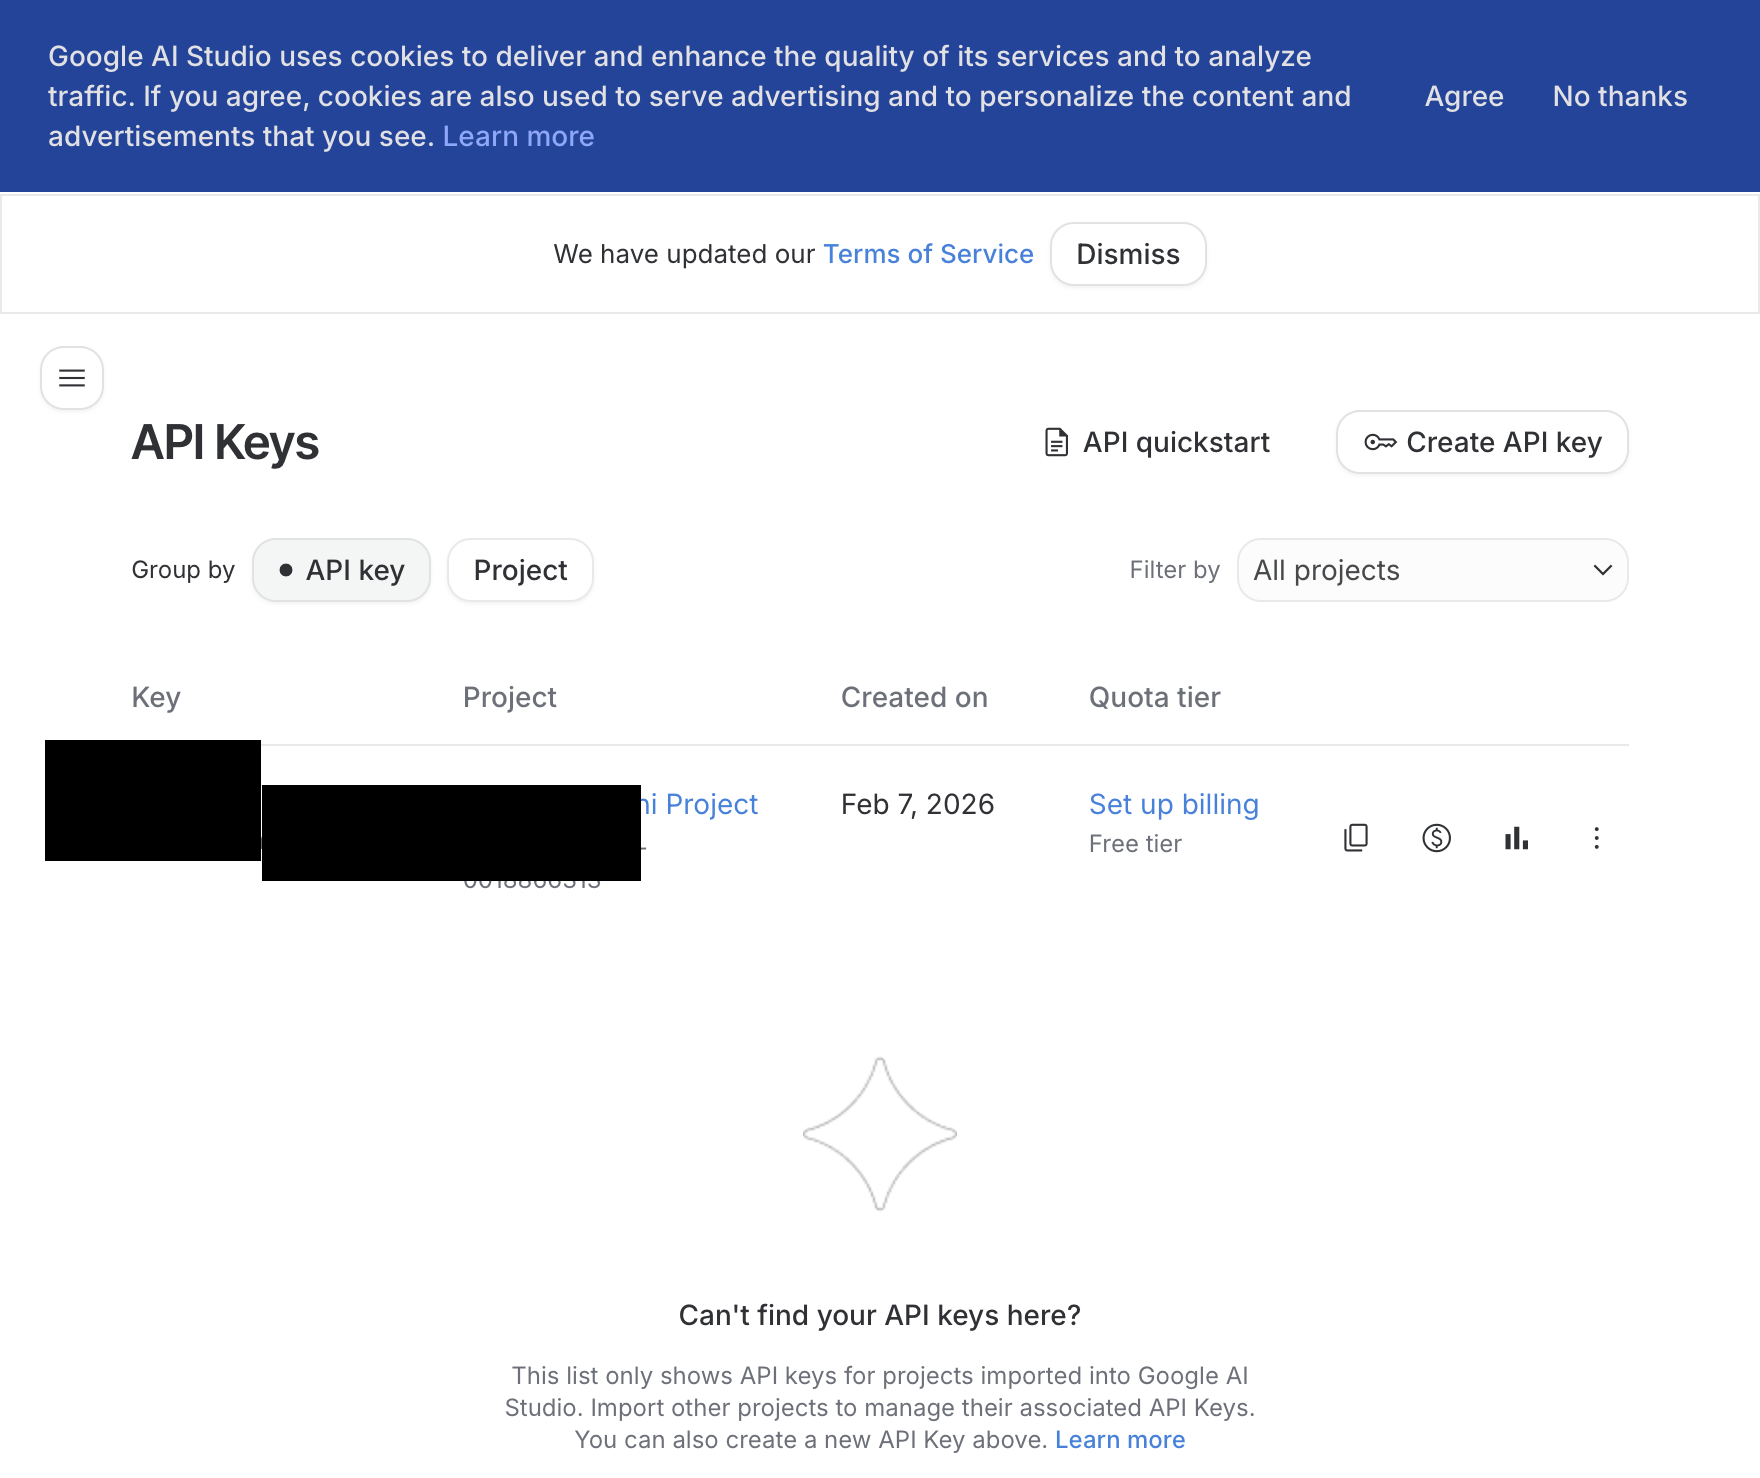
Google AI Studio — your API keys dashboard
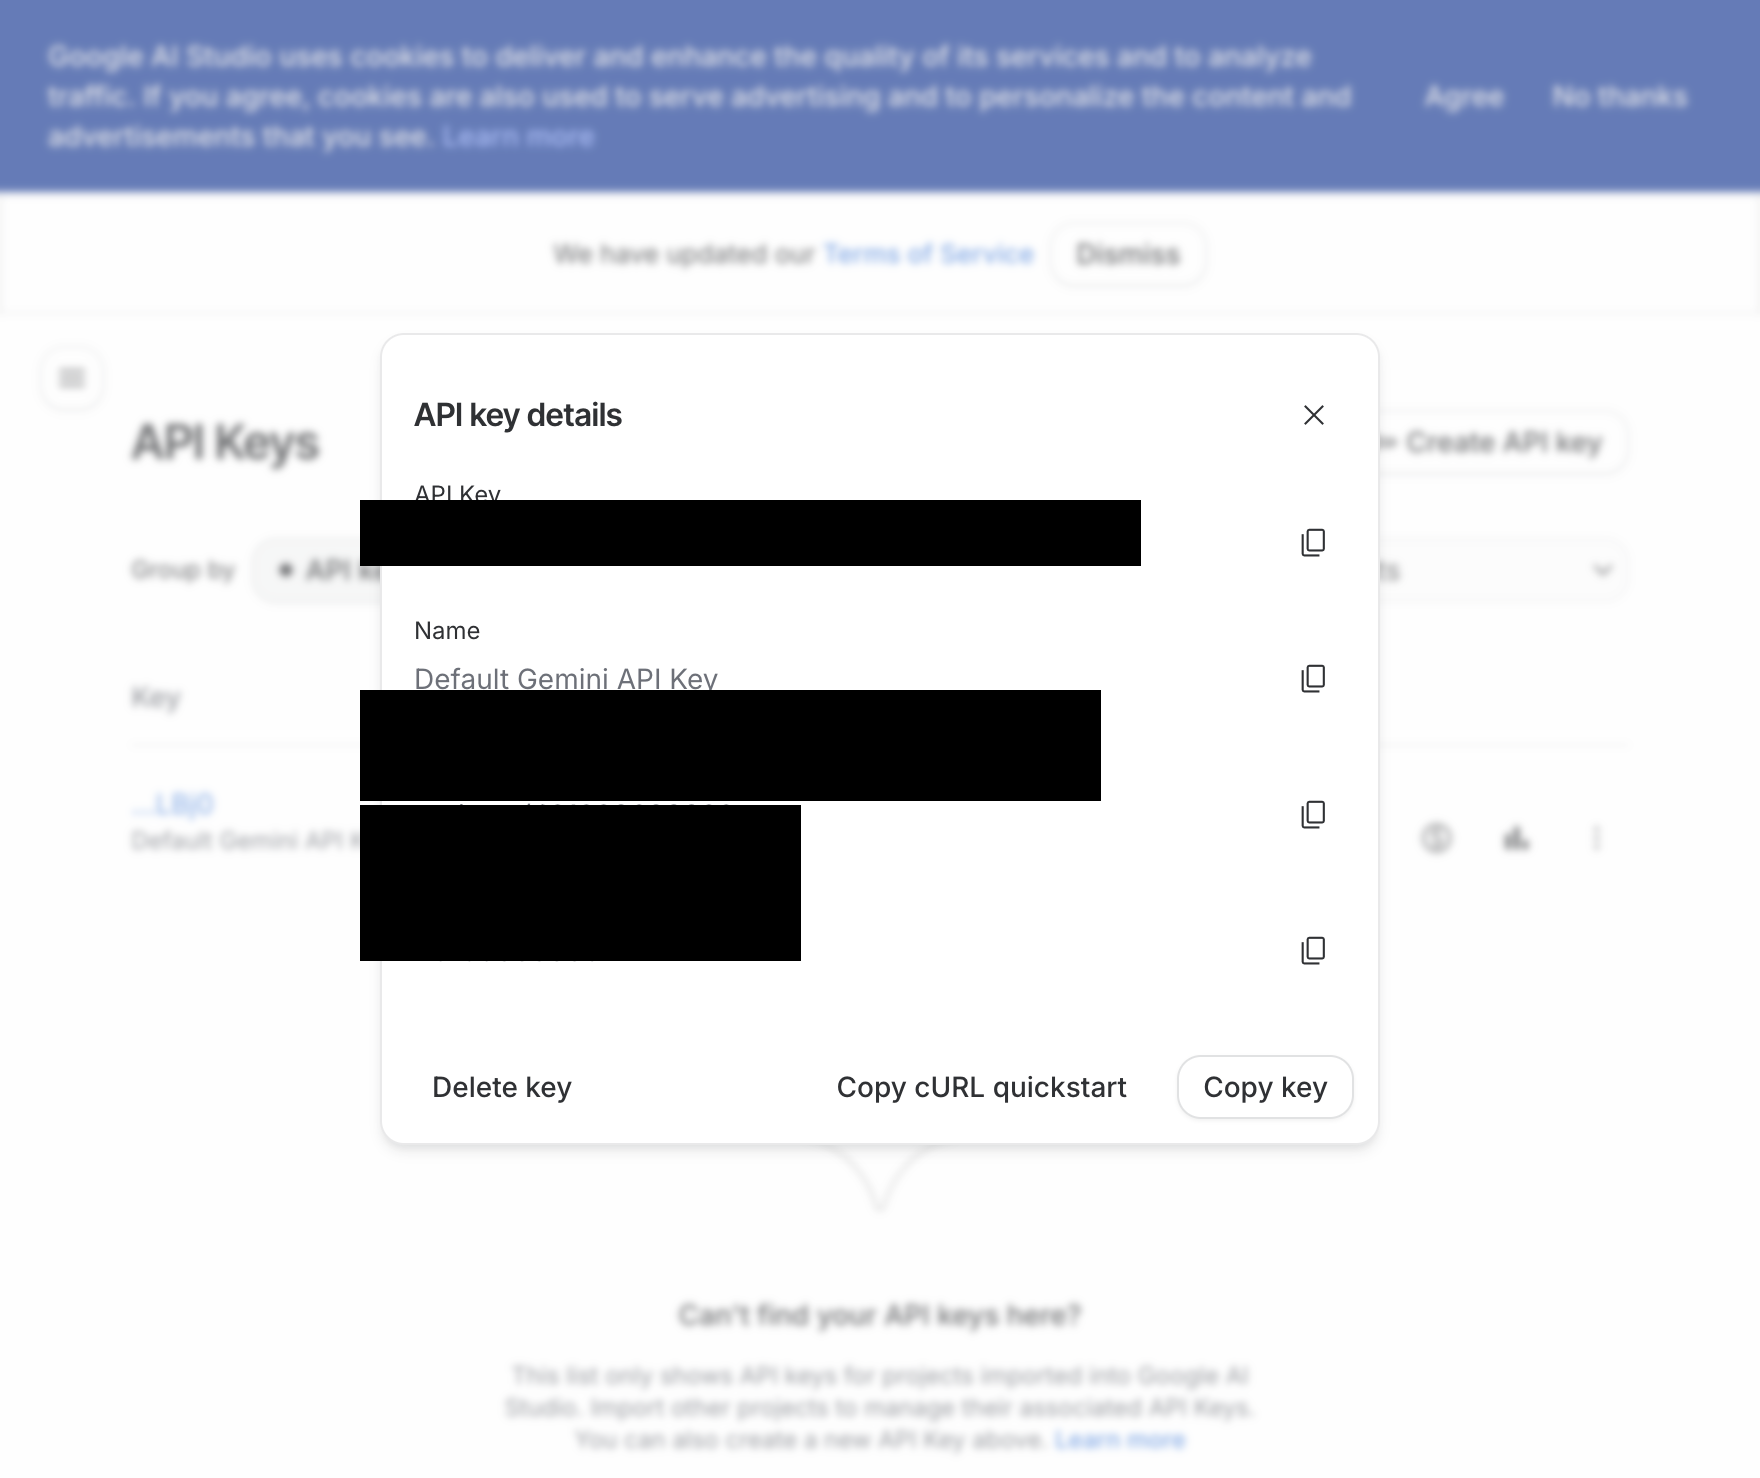
Click a key name to see details, then copy it
Your Files
The Files page shows your full workspace — everything your assistant knows and how it's configured. The top-level folders are:
| Folder | What it contains |
|---|---|
| agents/ | Your assistant's identity and personality files (admin and public agents) |
| memory/ | Knowledge files organised by audience (see below) |
| skills/ | Skill packs that teach your assistant new capabilities |
Inside memory/, files are organised by who can see them:
| Folder | Who can see it | What it's for |
|---|---|---|
| memory/public/ | Both assistants | Information your customers can ask about — services, pricing, opening hours |
| memory/shared/ | Both assistants | Internal guidance — how to handle enquiries, tone of voice, escalation rules |
| memory/admin/ | Admin assistant only | Private notes, business plans, personal reminders — customers never see this |
| memory/users/ | One customer at a time | A folder for each customer (by phone number) with their profile, preferences, and history |
All files are markdown (.md) — plain text with simple formatting.
Uploading and Managing Files
Click any folder in the tree to set it as your working directory. The folder highlights with a left border to show it's selected. The Upload and New Folder buttons show where files will go — for example, "Upload to memory/public".
- Upload — Click the Upload button or drag
.mdfiles onto a folder in the tree - New Folder — Creates a new folder inside the current directory (useful for adding skill packs or organising memory)
- Delete — Select a file and click Delete. The button changes to "Confirm delete?" — click again within 3 seconds to confirm. Empty folders show a small × on hover to remove them
- Move — Drag any file onto a different folder to move it there
- Multi-select — Hold Ctrl (or Cmd on Mac) and click multiple files, then use Download to save them all
When you add or change a file, your assistant picks it up automatically — no restart needed.
After a fresh install or upgrade, the embedding model downloads automatically (~330 MB). During the download, a full-screen overlay blocks all navigation with a "Downloading embedding model" message — this is a one-time download and typically takes a few minutes. Memory search is unavailable until the download completes.
When your assistant writes to public/ or shared/, a shield icon appears in the navigation bar so you can review what was written (see Data Safety Alert above).
Searching Memory
The Files page includes a memory search bar that lets you test what your assistant finds when it searches its knowledge base.
- Type a query in the Search memory box and press Enter (or click Search)
- Results show the file path, relevance score (as a percentage), matching line numbers, and a snippet of the matched text
- Click any result to open the file preview
- Use the agent selector dropdown next to the search bar to switch between agents (e.g., public vs admin) — this lets you verify what each assistant can see
- Click Clear to return to the normal file tree view
This is useful for diagnosing search issues — if your assistant can't find something in conversation, test the same query here to see what comes back.
Status Dashboard
The setup page shows a Status Dashboard with status indicators for each service (shown above after completing setup):
| Service | Green | Yellow | Grey |
|---|---|---|---|
| Gateway | Running | — | Not responding |
| Claude | Connected | — | Not connected |
| License | Active | — | — |
| Connected | Linked but not connected | Not paired | |
| iMessage | Connected | Configured but not running | Not configured |
| Software | Up to date | Update available | Not checked |
Your assistant is ready when Gateway and Claude are green. You can start chatting straight away using the Chat page. WhatsApp and iMessage are optional — connect them when you're ready.
Each service has a refresh button (circular arrow icon) you can tap to reconnect or restart. Tap the small (i) button next to any service to see detailed status information.
Refresh vs. Re-pair Buttons
The status dashboard has two different refresh mechanisms — use the right one to avoid creating unnecessary QR codes:
Refresh Status button (top of dashboard): Checks all services and refreshes their connection status. Use when WhatsApp shows yellow (linked but disconnected), or any service seems stuck. Does NOT create a new QR code — just refreshes the existing connection.
Circular arrow next to each service: Resets that specific service and generates a new QR code (for WhatsApp). Use when you need to completely re-pair WhatsApp from scratch. Creates a new QR code — you'll need to scan it again.
Rule of thumb: Try the Refresh Status button first. Only use the circular arrow next to WhatsApp if you need to re-pair from scratch.
WhatsApp Settings
When WhatsApp is connected, you'll see a small gear icon next to the WhatsApp label. Tap it to open the Public Agent Settings panel, which has three options:
- Enabled — When ticked, your assistant replies to messages from customers (anyone who isn't you). When unticked, only you can talk to the assistant.
- Model — Choose which AI model handles customer messages. You can pick Opus (most capable), Sonnet (balanced), or Haiku (fastest and cheapest). This only affects the public assistant.
- Thinking — Controls how deeply the public assistant reasons before responding to customers. “Off” is fastest. “Low” through “High” give increasingly thorough reasoning at the cost of speed.
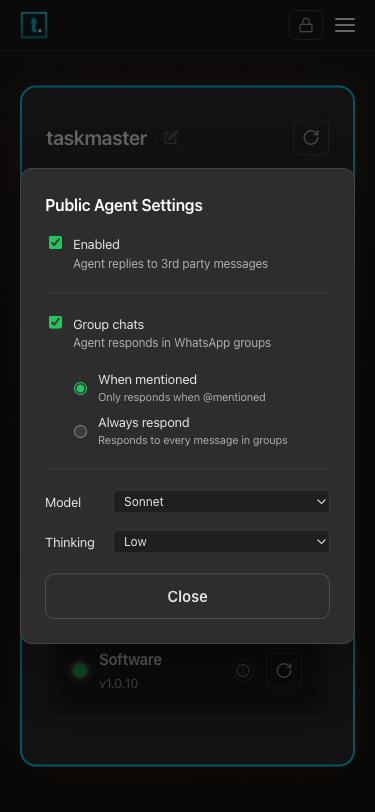
Public Agent Settings — control how your assistant responds to customers
Branding
Each account can have its own branding — a logo and colour scheme that appears on the control panel and on public chat pages (both the full page and the embeddable widget).
What you can customise
| Setting | What it does |
|---|---|
| Logo | Your business logo, shown in the navigation header and on public chat pages |
| Accent colour | The colour used for buttons, links, and interactive elements. Button text automatically switches to dark or light for readability. |
| Background tint | A colour wash blended into page backgrounds, cards, chat bubbles, and input fields |
How to set up branding
- Go to the Setup page
- Find the Branding row in the status dashboard
- Click Edit — a modal opens with your branding options
- Upload a logo — click Upload and select an image (PNG, JPEG, SVG, or WebP, max 2 MB). The logo appears in the navigation header and on public chat pages.
- Choose your accent colour — click the colour picker, or type a hex code (e.g.
#7C8C72) directly into the text field and press Enter - Choose your background tint — click the colour picker or type a hex code to add a colour wash across page backgrounds, cards, chat bubbles, and input fields (optional)
- Close the modal with the × button — changes are applied immediately
To clear an individual colour without resetting everything, click the Clear button next to that colour.
To see what each setting does, click the (i) button on the Branding row.
Per-account branding
Branding is set per account. If you have multiple accounts, switch to each account using the dropdown at the top of the page and set up branding for each one separately. When you switch accounts, the control panel immediately updates to show that account's colours and logo.
Resetting to defaults
To remove all custom branding and return to the default colours, open the Branding modal and click Reset to defaults. To remove just one colour, click Clear next to it. To remove just the logo, click Remove next to the logo preview.
Where branding appears
- Control panel — accent colour and background tint update immediately across all pages
- Public chat page — visitors see your logo, accent colour, and background tint
- Chat widget — the embedded widget on your website uses your accent colour for the chat button and background tint for the overlay
Advanced
The Advanced page has four tabs for monitoring and managing your assistant behind the scenes. You don't need these day-to-day, but they're useful when you want to see what's happening under the hood.
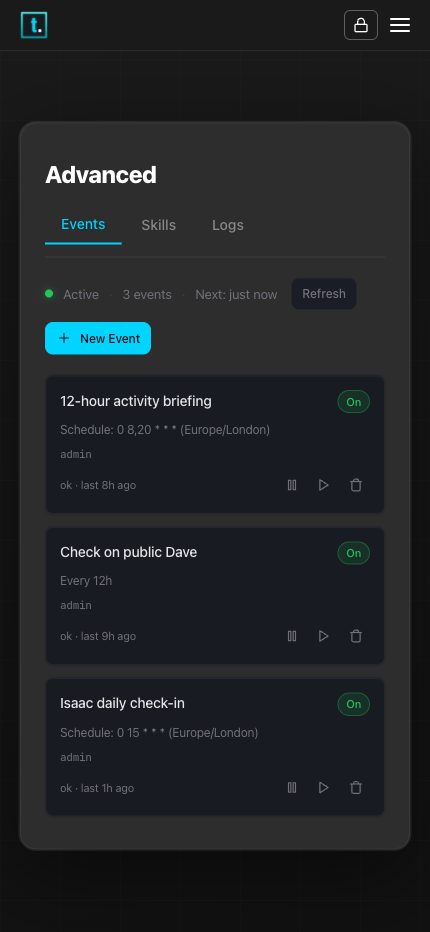
The Advanced page — Events tab showing scheduled tasks and automations
Events
This is where you can see and manage everything your assistant does on a schedule — reminders, daily briefings, recurring tasks. Your assistant creates these when you ask it to (“remind me every Monday” or “send me a briefing at 7am”), and they appear here as cards.
Each event card shows its name, schedule, and whether it's on or off. You can:
- Tap a card to see full details and recent activity
- Pause or resume an event using the pause/play icon
- Run now — trigger an event immediately
- Delete an event using the trash icon
- Create a new event — tap “New Event” to open the form
Skills
Skills are specialised abilities your assistant has — handling customer enquiries, creating quotes, checking the weather, and more. The Skills tab shows every skill that is installed, whether it's active, and if anything is missing (such as an API key the skill needs).
Preloaded vs User labels. Each skill is labelled Preloaded (built-in and always available) or User (created by you or your assistant).
Filtering. Use the All, Preloaded, and User buttons at the top of the list to filter which skills are shown.
Viewing skill details. Tap any skill to open its detail view. From here you can read the skill's instructions and browse its reference files using the tabs at the top of the detail panel.
Editing a skill. While viewing a skill's detail, click Edit to open the editor. If you are viewing a reference tab when you click Edit, the editor opens directly on that reference file. The editor has tabs for the main SKILL.md file and each reference file.
Enable, disable, and delete. User skills can be enabled or disabled with the toggle, or deleted entirely. Preloaded skills cannot be disabled or deleted.
Drafts workflow:
- Ask your assistant to create a skill — it walks you through the process and saves a draft when you're happy
- Open Drafts in the Skills tab to see pending drafts
- From the drafts list you can Edit (review and modify), Install (activate the skill), or Delete the draft
- Editing a draft and saving keeps it in drafts until you explicitly install it. Editing an already-installed skill and saving updates it immediately.
- The draft editor has tabs for the main SKILL.md file and any reference files, just like the installed-skill editor
Logs
The Logs tab has two views, selectable with the toggle at the top:
Session Logs show the actual conversations your assistant is having — messages from customers, the assistant's responses, tool calls it makes, and any errors. You can filter by:
- Type — show only certain kinds of entries (messages, tool calls, thinking, errors)
- Agent — show only entries from a specific agent (e.g., public or admin)
- Search — free-text search across all entries
System Logs show the internal machinery of the gateway — connections, heartbeats, startup messages. This is mainly useful for troubleshooting when something isn't working.
Both views support auto-follow (keeps the view scrolled to the latest entries) and export to download a log file.
Changing Network Settings
You can change the port and hostname directly from the Setup page — no terminal access needed.
- Port — The number at the end of your control panel URL (e.g.,
http://taskmaster.local:18789) - mDNS hostname — The friendly name before
.local(e.g.,taskmasterintaskmaster.local)
What is the port and why would I change it?
The port is like an apartment number for your Taskmaster server. The default is 18789.
When to change it:
- Another device on your network is already using port 18789
- Your router or firewall blocks that port
- You're running multiple Taskmaster instances and need them on different ports
What happens when you change it: Your control panel URL changes. If you set the port to 19000, you'll access Taskmaster at http://taskmaster.local:19000.
What is the mDNS hostname and why would I change it?
The mDNS hostname is the friendly name you use to access your device on your local network. The default is taskmaster, so your control panel is at taskmaster.local.
When to change it:
- You're running multiple Taskmaster instances on the same network (they'll conflict if they all use
taskmaster.local) - You want custom branding (e.g.,
dave.local,assistant.local,plumbing-helper.local)
What happens when you change it: Your control panel URL changes. If you set the hostname to dave, you'll access Taskmaster at http://dave.local:18789.
How to change port and hostname
- Go to the Setup page
- Find the Network row in the status dashboard — it shows your current hostname and port
- Tap Edit — a modal opens with two fields: Hostname and Port
- Change whichever values you need (hostname: letters, digits, and hyphens only, 1–63 characters; port: 1024–65535)
- Tap Save
- The gateway restarts automatically and your browser redirects to the new URL
After saving, there is a brief pause while the gateway restarts. Your browser will redirect to the new address automatically. If the page doesn't load within a few seconds, navigate to the new URL manually (e.g. http://dave.local:19000).
Fallback: CLI method
If you can't reach the Control Panel (e.g. the gateway is down), you can make the same changes from the terminal.
Changing the port:
taskmaster config set gateway.port 19000
taskmaster daemon install --force
Important: Use taskmaster daemon install --force (not taskmaster daemon restart) to pick up the new port.
Changing the hostname (Linux / Raspberry Pi):
sudo hostnamectl set-hostname dave
sudo sed -i "s/127\.0\.1\.1.*/127.0.1.1\tdave/" /etc/hosts
sudo systemctl restart avahi-daemon
Changing the hostname (macOS):
sudo scutil --set LocalHostName daveAfter either method, access the control panel at the new URL (e.g. http://dave.local:19000).
Flushing DNS Cache on Other Devices
After a hostname change, the device you're browsing from (your phone, laptop, etc.) may have cached the old name. If the control panel doesn't load from another device, flush the DNS cache:
| Device | How to flush |
|---|---|
| Mac | Open Terminal and run: sudo dscacheutil -flushcache && sudo killall -HUP mDNSResponder |
| Windows | Open PowerShell and run: ipconfig /flushdns |
| Linux | Run: avahi-resolve -n dave.local (probes directly, bypasses cache) |
| iPhone / iPad | Toggle Airplane Mode on and off, or toggle WiFi off and on |
| Android | Toggle WiFi off and on |
After flushing, open your browser and navigate to the new URL (e.g. http://dave.local:19000). If you still can't connect, try a hard refresh (Ctrl+Shift+R or Cmd+Shift+R) or open a new private/incognito window to rule out browser caching.
Still Can't Connect?
If the control panel still doesn't load from another device:
- Use the IP address directly — on the device, run
hostname -I(Linux/Pi) or check System Preferences > Network (Mac) to get its IP address, then openhttp://192.168.1.XXX:18789(use your IP and port) from the other device. If this works, the problem is mDNS resolution, not the gateway. - Check you're on the same network — mDNS only works between devices on the same WiFi/LAN. It won't work across VLANs or guest networks.
- Contact support with: what you changed (port/hostname), the output of
hostname, andtaskmaster daemon status.
Static IP Address
You don't need to assign a static IP address — Taskmaster uses a .local hostname that resolves automatically via mDNS, even if the IP changes after a reboot or DHCP renewal. You'll always find your control panel at the same .local address.
That said, if your IT team prefers to pin devices to static IPs (common on managed business networks), they can do so via DHCP reservation on your router. They'll need the device's MAC address:
- SSH into the Pi (see Enabling SSH below)
- Run:
ip link show - Look for the
link/etherline under the active interface (eth0for wired,wlan0for WiFi) - Give that MAC address to your IT team to create a DHCP reservation
This is entirely optional and is a network preference, not a Taskmaster requirement.
Troubleshooting
Can't access the Control Panel?
If you can't load the Control Panel in your browser:
- Same network? — Make sure your device is on the same WiFi or LAN as Taskmaster
- Check the URL — go to
http://taskmaster.local:18789and port18789. Bothhttpandhttpswork — HTTP automatically redirects to HTTPS - Certificate warning? — On first access, your browser shows a security warning. Click through it (see Secure Connection above for steps). This is a one-time step
- Wait for boot — after powering on the device, it takes 2–3 minutes for everything to start. If you just plugged it in, give it a moment
- Try a different browser — some browsers have trouble with
.localaddresses. Try Chrome or Safari - Use the IP address — if
.localdoesn't resolve, find the device's IP address on your router and go tohttp://<ip-address>:18789instead
Messages not getting through?
- Go to
http://taskmaster.local:18789/setup - Check which indicator is not green
- Tap the circular arrow button next to the problem service
WhatsApp shows yellow (Linked but not connected)?
WhatsApp is linked but the connection dropped. This often resolves itself. If not:
- Go to
http://taskmaster.local:18789/setup - Tap “Refresh Status” — it may reconnect automatically
- If still yellow after a minute, tap the circular arrow next to WhatsApp to relink
WhatsApp messages failing with “No sessions” or “Bad MAC” errors?
The WhatsApp connection for one of your accounts has lost sync. This can happen after a power cut, an unclean shutdown, or when WhatsApp rotates its security keys. Other accounts on the same device are not affected — only the account with the problem stops sending or receiving.
Try a restart first:
- Go to
http://taskmaster.local:18789/setup - Tap the circular arrow next to Gateway to restart it
- Wait 30 seconds — if WhatsApp reconnects and turns green, you're done
On a Raspberry Pi, you can also just unplug the device, wait 10 seconds, and plug it back in.
If restarting doesn't fix it, re-pair WhatsApp from scratch (see below).
WhatsApp needs re-pairing (linking fails, status red, or out of sync)?
If WhatsApp linking keeps failing, the status stays red despite showing “linked” on your phone, or the connection data is corrupted — you need to start fresh:
- Go to
http://taskmaster.local:18789/setup - Tap “Reset WhatsApp” (red button)
- On your phone: WhatsApp → Settings → Linked Devices
- Remove “macOS” (Taskmaster's connection) from the list if present
- Scan the new QR code
Claude connection expired?
- Go to
http://taskmaster.local:18789/setup - Tap the circular arrow next to Claude (or “Connect to Claude” if shown)
- Sign in and enter the code
Gateway not responding?
- Go to
http://taskmaster.local:18789/setup - Tap the circular arrow next to Gateway to restart it
- Wait 30 seconds for it to come back online
- If still not working, try unplugging your Taskmaster device, waiting 10 seconds, and plugging it back in
Assistant not replying during an AI service outage?
Occasionally, AI providers like Claude experience temporary outages or slowdowns. When this happens, Taskmaster automatically tries to get a reply from a different AI provider instead.
- If you have backup providers configured (e.g., a Google AI key or OpenAI key added on the Setup page), your assistant switches to those automatically. You don't need to do anything — replies keep coming, just from a different AI model behind the scenes.
- If you only have one provider (e.g., Claude with no other API keys), messages sent during the outage won't get a reply. The customer's message is received but the assistant can't respond until the service recovers.
- Messages are not queued. If a message arrives during an outage and all providers are down, it won't be retried automatically. The customer (or you) will need to send the message again once the service is back.
- Your conversation history is safe. An outage doesn't corrupt or lose any previous conversations. Once the service recovers, everything picks up where it left off.
What you can do to stay protected:
- Add backup API keys — Go to the Setup page, tap API Keys, and add keys for Google AI and/or OpenAI alongside your Claude connection. These act as automatic backups.
- Check your logs — If replies are failing, open Advanced → Logs → Session Logs and filter by “errors” to see what's happening.
- Wait it out — Most AI service outages resolve within minutes to hours. Your assistant will automatically use the primary provider again once it's back.
“sudo: unable to resolve host taskmaster” warning?
This harmless warning appears when the Pi's hostname isn't listed in /etc/hosts. Every sudo command still works — it's just a cosmetic message. To fix it, open a terminal on the Pi and run:
sudo sh -c 'echo "127.0.1.1 taskmaster" >> /etc/hosts'Replace taskmaster with your actual hostname if you changed it (e.g., taskmaster-19000 for a custom port). The warning disappears immediately.
Multiple Accounts
You can run more than one account on the same Taskmaster device. Each account gets its own assistant identity, customer knowledge, and WhatsApp number — completely separate from your other accounts.
Adding a Second Account
- Go to the Setup page
- Scroll down to Your Accounts
- Tap “+ Add Account”
- Enter a name for the account (e.g., “My Plumbing Company”)
- Tap Create — the system will set up the workspace and restart
- When the QR code appears, scan it with the WhatsApp number for this account
- Your new account is live
How It Works
- Each account has its own public assistant (handles customers) and admin assistant (handles you)
- Each account has its own files and memory — customers of one account don't see data from another
- Each account connects to its own WhatsApp number
- You manage all accounts from the same Setup page
Renaming Your Account
The name you see in the account selector and dashboard can be changed at any time:
- Go to the Setup page
- Click the pencil icon next to your account name in the dashboard header
- Type the new name (e.g., “Joe's Coffee Shop”)
- Press Enter to save, or Escape to cancel
Removing an Account
- Go to the Setup page
- Find the account under Your Accounts
- Tap the X button next to it
- Confirm removal
This removes the assistant and routing but keeps the account files on disk.
iMessage (Mac only)
If you're running Taskmaster on a Mac, you can also talk to your assistant by messaging yourself in the Messages app — no WhatsApp needed.
What it does
When you send a message to yourself in Messages.app, your assistant replies in the same conversation. It works just like the admin chat on WhatsApp, but through iMessage.
Note: In Messages.app, self-chat messages appear on both sides of the conversation (blue and grey). This is normal — it's how Apple designed self-chat. Your assistant only replies once; the double appearance is a visual quirk of Messages.app.
One account at a time
Unlike WhatsApp — where each account has its own phone number — iMessage shares a single Messages app across all accounts. Only one account can use iMessage at a time.
- The account that's selected when you enable iMessage gets it
- Other accounts will show “Not connected — iMessage is connected to {Account Name}”
- To move iMessage to a different account, select that account and tap the refresh button
Self-chat only
iMessage is for self-chat only — messages from other people are not processed. It works like your private admin channel, separate from WhatsApp which handles customer messages.
How to enable
- Go to the Setup page
- Select the account you want to connect (if you have more than one)
- Find the iMessage row in the status dashboard
- Tap the circular arrow button
- A confirmation message appears — tap Enable
- The gateway will restart automatically
- When the iMessage row turns green, you're ready
Before you start
iMessage support requires two things on your Mac before running Taskmaster setup:
- Xcode or Xcode Command Line Tools (up to date)
- If you don't have Xcode at all — open Terminal and run:
xcode-select --install - If you have Xcode from the App Store but it's outdated — open the App Store, find Xcode, and click Update
- If you don't want to update Xcode — run:
sudo xcode-select --switch /Library/Developer/CommandLineTools
- If you don't have Xcode at all — open Terminal and run:
- Homebrew — if you don't already have it, open Terminal and run:
/bin/bash -c "$(curl -fsSL https://raw.githubusercontent.com/Homebrew/install/HEAD/install.sh)"
Grant Full Disk Access
Taskmaster's iMessage helper needs permission to read the Messages database. There are three steps:
Step 1: Sign the binaries
sudo codesign --force --sign - $(realpath $(which imsg))
sudo codesign --force --sign - $(realpath $(which node))
Step 2: Grant Terminal Full Disk Access
- Open System Settings > Privacy & Security > Full Disk Access
- Click the + button
- Navigate to Applications > Utilities > Terminal and click Open
- Make sure the toggle next to Terminal is on
- Quit Terminal completely (Cmd+Q) and reopen it
Step 3: Grant the Node.js binary Full Disk Access
- Open Terminal and run:
realpath $(which node) - Open a Finder window and press Cmd+Shift+G
- Paste the folder path and press Enter
- Open System Settings > Privacy & Security > Full Disk Access
- Drag the
nodefile from Finder onto the list - Make sure the toggle is on
Why drag from Finder? The file picker (+) button sometimes has trouble with command-line binaries. Dragging from Finder is more reliable. Always use the real path (from realpath), not /usr/local/bin/node — that's a symlink that macOS silently ignores.
iMessage Troubleshooting
“permission denied” errors in logs?
Full Disk Access has not been granted to imsg. Follow the “Grant Full Disk Access” steps above.
“Xcode too outdated” or “imsg installation failed”?
- Update Xcode — open the App Store and update Xcode
- Switch to Command Line Tools — run:
sudo xcode-select --switch /Library/Developer/CommandLineTools - Install Command Line Tools — run:
xcode-select --install
After any of the above, re-run: pnpm taskmaster daemon install --force
iMessage row stays grey after enabling?
Open Terminal and type imsg --version. If it says “command not found”, re-run: pnpm taskmaster daemon install --force
Using Your Pi as a Desktop
Your Raspberry Pi is a full computer — you can connect a monitor, keyboard, and mouse and use it directly.
What you need
- A micro-HDMI cable (or micro-HDMI to HDMI adapter) to connect a monitor or TV
- A USB keyboard and USB mouse
What you can do
Browse your files — Open the file manager from the desktop and navigate to the home folder. You'll see your workspace files — the same ones that appear on the Files page.
Access the dashboard locally — Open the web browser and go to http://localhost:18789 to use the full Taskmaster dashboard directly on the Pi.
General desktop use — The Pi runs a full desktop environment. You can browse the web, view documents, and use any standard Linux applications.
Finding Your Pi's IP Address
You need the IP address to connect from another device on your network (e.g., SSH, or if taskmaster.local isn't working).
From the Pi itself (monitor + keyboard):
- Open Terminal (taskbar or Ctrl+Alt+T)
- Run:
hostname -I - The first number shown is your IP address (e.g.,
192.168.1.42)
From your Mac or PC (without a monitor on the Pi):
- Before install: Run
ping -c 1 raspberrypi.local— a fresh Pi advertises this hostname by default - After install: Run
ping -c 1 taskmaster.local— the install changes the hostname to “taskmaster” - Router: Check your router's admin page (usually
192.168.1.1) — look for a device called “taskmaster” or “raspberrypi” in the connected devices list
Once you have the IP, you can access the setup page at http://<your-pi-ip>:18789/setup or connect via SSH with ssh admin@<your-pi-ip>.
Enabling SSH on Your Pi
SSH lets you connect to your Pi from another computer on the same network — no monitor or keyboard needed. Raspberry Pi OS has SSH turned off by default. To enable it:
Option 1: From the Pi desktop (monitor + keyboard)
- Click the Raspberry Pi menu (top-left corner of the desktop)
- Go to Preferences → Raspberry Pi Configuration
- Click the Interfaces tab
- Set SSH to Enabled
- Click OK
Option 2: From the Pi terminal
- Open Terminal (taskbar or Ctrl+Alt+T)
- Run:
sudo systemctl enable --now sshOption 3: Before first boot (headless setup — no monitor needed)
If you're setting up the Pi using Raspberry Pi Imager:
- In Raspberry Pi Imager, click the gear icon (or press Ctrl+Shift+X) before writing the SD card
- Check Enable SSH and set a password
- Write the SD card and boot the Pi
Or, if the SD card is already written:
- Insert the SD card into your computer
- Create an empty file called
ssh(no extension) in the boot partition - Eject the card and boot the Pi
After enabling SSH, connect from another computer:
ssh admin@taskmaster.localEnter the password when prompted. The default password depends on how the Pi was set up — typically taskmaster for pre-installed devices, or whatever you chose during Raspberry Pi OS setup.
Security tip: Change the default password after your first SSH login by running passwd on the Pi.
Public-Facing Messages (DM Policy)
By default, your assistant responds to messages from anyone who contacts your WhatsApp number. You can turn this off so that only admin phones get through.
Toggling Public Messages
- Go to the Setup page
- In the status dashboard, find the Public facing toggle (under your WhatsApp connection)
- Toggle it on to accept messages from anyone, or off to block unknown senders
When public messages are off:
- You (the phone that scanned the QR code) can still message your assistant
- Admin phones (added on the Admins page) can still message your assistant
- Everyone else is blocked — they won't get a response
When public messages are on: Anyone who messages your WhatsApp number gets a response from your public assistant.
No restart is needed — the change takes effect immediately.
Remote Access
Remote Access lets you reach the control panel from anywhere — your phone, another computer, or while away from home. It uses Tailscale to create a private, encrypted connection with a trusted HTTPS certificate (no browser warnings).
What you need
- Tailscale installed on the Taskmaster device (the Raspberry Pi or Mac running Taskmaster)
- Tailscale installed on every device you want to access the control panel from (your phone, laptop, etc.)
- All devices logged into the same Tailscale account
Tailscale is free for personal use (up to 100 devices). Apps are available for iOS, Android, Mac, Windows, and Linux.
Enabling Remote Access
- Open the control panel setup page
- Find the Remote Access row in the status dashboard
- If Tailscale is not connected, click Connect — scan the QR code with your phone and sign in with your Google or Microsoft account
- Once connected, click the power icon to enable
- A URL appears like
https://taskmaster.tail0e0afb.ts.net - Bookmark this URL on your other devices — it's your personal, trusted HTTPS address for the control panel
Accessing from other devices
- Install Tailscale on the device (phone, laptop, etc.)
- Log in with the same account you used on the Taskmaster device
- Open the bookmarked URL — no certificate warnings, just a normal secure connection
Disabling Remote Access
Click the power-off icon on the Remote Access row. You'll be asked to confirm — click Confirm to proceed. The tailnet URL stops working immediately (no gateway restart needed).
Internet Access
By default, Taskmaster is only reachable on your local network and via Tailscale (if enabled). If you want people outside your network to use the public chat widget — for example, embedding it on your website — you need to enable Internet Access.
This uses Tailscale Funnel, a free service that gives your device a public HTTPS address. Only the public chat is exposed; the control panel stays private.
Enabling Internet Access
- Go to the Setup page (you must be logged in as admin)
- Find the Remote Access row in the status dashboard
- If Remote Access is not already enabled, enable it first (see above)
- Once remote access is active, click the globe icon on the same row to enable internet access
- If this is your first time, you may see a message asking you to enable Funnel on your Tailscale account — click the link, toggle Funnel on, then try again
- Your public URL appears (e.g.
https://taskmaster.tail0e0afb.ts.net)
What gets exposed
/public/*paths only — the public chat widget and API- The control panel, setup page, and all admin functions stay private (LAN + Tailscale only)
- No one can access your settings, files, or WhatsApp from the internet
Disabling
Click the globe-off icon on the Remote Access row. The public URL stops working immediately. Remote access to the control panel remains active.
Copy your URL
When Remote Access is active, click the copy icon next to the URL. If Internet Access is also enabled, the same URL serves as your public URL — share it or embed it on your website.
Embedding the chat widget on your website
Once Internet Access is enabled, you can add a floating chat button to any website. Add this code just before the closing </body> tag:
<script src="https://YOUR-PUBLIC-URL/public/widget.js"></script>
<script>
  Taskmaster.init({
    server: "https://YOUR-PUBLIC-URL",
    accountId: "your-account-id"
  });
</script>
Replace YOUR-PUBLIC-URL with the URL shown on the Remote Access row (e.g. https://taskmaster.tail0e0afb.ts.net) and your-account-id with your account name (e.g. taskmaster).
A chat button appears in the bottom-right corner of the page. Clicking it opens a chat window where visitors can talk to your assistant — no WhatsApp required.
You can optionally set colours to match your website: color controls the floating chat button, and bgColor controls the chat overlay background. If you've set up branding on the Setup page, the widget uses your brand colours automatically — these init options override them if provided.
Chat Commands
You can control your assistant's behaviour by typing slash commands in any conversation. These are intercepted by the system — the assistant never sees them.
How commands work
- Type a command on its own (e.g.,
/filler on) — the system responds with a confirmation - Type a command without an argument (e.g.,
/filler) — the system shows the current setting and valid options - Commands work in WhatsApp, iMessage, and the Chat page
- Only admin phone numbers can use most commands
Common commands
| Command | What it does |
|---|---|
/help | Show available commands |
/status | Show current settings (model, thinking level, etc.) |
/filler on | Turn on filler messages — quick acknowledgments like “Let me check...” while the assistant thinks |
/filler off | Turn off filler messages |
/verbose on | Turn on verbose mode — the assistant shows more detail in responses |
/verbose off | Turn off verbose mode |
/think [level] | Set thinking depth: off, minimal, low, medium, high |
/model [name] | Show or switch the AI model (e.g., /model opus) |
/models | List all available models |
/new | Start a fresh conversation — clears history and reloads instructions |
/compact | Refresh instructions without losing conversation history |
/stop | Stop the assistant mid-response |
/restart | Restart the Taskmaster gateway |
/activation always | Make the assistant respond to every group message |
/activation mention | Make the assistant only respond when @mentioned in groups |
Voice replies (Text-to-Speech)
Your assistant can reply with voice notes instead of text. Two providers are available:
| Provider | Requires API key? | Notes |
|---|---|---|
| Edge (Microsoft) | No — free, works immediately | Good quality neural voices, many languages |
| Hume | Yes — add in Setup > API Keys | Expressive, emotionally-aware voice |
Control voice replies with the /tts command:
| Command | What it does |
|---|---|
/tts always | Every reply is sent as a voice note |
/tts inbound | Reply with voice only when you send a voice note |
/tts off | Turn off voice replies |
/tts provider edge | Use Microsoft Edge TTS (free) |
/tts provider hume | Use Hume Octave TTS (requires key) |
/tts status | Show current mode, provider, and fallback chain |
Quick start: Type /tts always — Edge TTS works immediately with no setup. To upgrade to Hume's expressive voice, add a Hume API key in the Control Panel and type /tts provider hume.
Groups
Your assistant can respond in WhatsApp group chats. By default, groups are disabled.
Enabling Groups
Open the Control Panel, go to the WhatsApp section, and tap the settings (gear) icon on your WhatsApp account. In the settings modal, tick Group chats. This allows your assistant to respond in any WhatsApp group it's added to.
How the Assistant Responds
When you enable groups, you choose how the assistant responds:
- When mentioned (default) — the assistant only responds when someone @mentions it
- Always respond — the assistant responds to every message in every group
Per-Group Override
Group members can override the response mode for their specific group using chat commands:
/activation always— respond to every message in this group/activation mention— only respond when @mentioned
Only the business owner can change the activation mode.
Updating Taskmaster
Checking for Updates
Taskmaster checks for updates automatically when you open the Setup page. The Software row in the Status Dashboard shows your current version and whether an update is available:
- Green — You're running the latest version
- Yellow — An update is available (shows the new version number, e.g., “v1.0.38 → v1.0.39”)
- Grey — Not yet checked
If the row shows “Unknown”, tap the refresh button (circular arrow) to check manually. Tap the (i) button to see version details (current version, latest version, and status).
Installing an Update
- Open the Setup page
- Look for the Software row — if it's yellow, an update is available
- Tap the download button (down-arrow icon)
- A progress overlay appears showing each step of the update (fetching, building, running checks, etc.)
- When the update completes, the gateway restarts automatically
- The page reconnects on its own — you'll see a result banner showing the version change (e.g., “Updated: v1.0.38 → v1.0.39”)
- The Software row should now show green
You don't need to refresh the page — the overlay stays visible during the update and the page reconnects automatically after the gateway restarts.
Alternative: Re-run the Installer
You can also update by re-running the install command in Terminal:
curl -fsSL https://taskmaster.bot/install.sh | sudo bashThis detects your existing installation and upgrades it in place.
If an Update Fails
If something goes wrong during the update:
- The progress overlay shows which step failed (marked with an X)
- A result banner appears with the failure reason
- Your previous version remains running — a failed update does not leave your system broken
- Tap Dismiss to close the result banner
If the page loses connection during the update and doesn't reconnect within two minutes, refresh the page manually. If the gateway doesn't come back, try power-cycling your device (unplug and replug).
Note: Updates require an internet connection. The update process typically takes 30–60 seconds. Your assistant will be briefly unavailable during the restart.
Automatic Recovery from Bad Updates
On Raspberry Pi and Linux devices, Taskmaster includes an automatic safety net. If an update installs a version that crashes on startup, the system detects the crash loop and automatically rolls back to the previous working version. You don't need to do anything — the rollback happens on its own and the dashboard comes back online within about 30 seconds.
After an automatic rollback, a banner on the Setup page shows what happened (e.g., “Auto-rollback to v1.0.70 after 3 consecutive startup failures”). You can try updating again later — the issue may be fixed in a newer version.
Command Line (CLI)
Taskmaster includes a command-line tool called taskmaster that you can run in a terminal (Terminal on Mac, or via SSH on a Pi). You don't need the command line for day-to-day use — the Control Panel handles everything — but it's useful for troubleshooting, updating when the Control Panel isn't accessible, or automating tasks.
How to access the terminal
- Mac: Open Terminal (search for “Terminal” in Spotlight)
- Raspberry Pi (direct): Plug in a keyboard and monitor, open Terminal from the taskbar
- Raspberry Pi (remote): From another computer, run
ssh admin@taskmaster.local(replacetaskmasterwith your hostname if changed)
Essential commands
| Command | What it does |
|---|---|
taskmaster update | Update to the latest version and restart the service |
taskmaster daemon restart | Restart the gateway service (picks up code and config changes) |
taskmaster daemon status | Check if the gateway service is running |
taskmaster doctor | Run health checks and fix common issues automatically |
taskmaster status | Show connection status for all channels (WhatsApp, Claude, etc.) |
taskmaster dashboard | Open the Control Panel in your browser |
Configuration commands
| Command | What it does |
|---|---|
taskmaster config set <key> <value> | Change a config setting (e.g., taskmaster config set gateway.port 19000) |
taskmaster config get <key> | Read a config setting |
taskmaster config | Open the interactive config wizard |
When to use the CLI instead of the Control Panel
- Can't reach the Control Panel — If the web UI is down, SSH into the device and use CLI commands to restart or update
- Updating from a specific version —
taskmaster updateworks even when the Control Panel can't load - Changing network settings when the UI is unreachable — Port and hostname are normally changed from the Setup page, but the CLI works as a fallback (see “Changing Network Settings” above)
- Diagnosing problems —
taskmaster doctorruns automated health checks that can detect and fix issues the UI can't show
Getting help for any command
Add --help to any command to see its options:
taskmaster update --help
taskmaster daemon --help
taskmaster config set --help
Or run taskmaster help to see all available commands.
Uninstalling Taskmaster
From the Control Panel
- Open the Setup page
- Scroll to the bottom of the dashboard
- Tap Uninstall Taskmaster (in red)
- Type UNINSTALL in the confirmation box
- Tap the Uninstall button
This stops the gateway, removes all configuration, workspace files, and attempts to remove the npm package. If the package could not be removed automatically (permissions), the page will show a command to run manually.
From the command line
To remove everything in one command:
taskmaster uninstall --purge --yesThis removes the gateway service, configuration (~/.taskmaster), workspace files (~/taskmaster), and the npm package itself.
Getting Help
- Email: taskmaster@rubytech.llc
- WhatsApp: +44 7591 215452
Taskmaster — Your admin assistant that works while you work.